With real-time audiovisual applications that rely on any kind of interactivity, each frame comes and goes like a fleeting moment. A moment you might want to capture, frame and hang on a wall. Fortunately, NAP 0.4.2 includes nap::Snapshot: a new high-resolution screenshot resource that can take stunning frame captures of extreme image quality. In this post, I will briefly explain how it works.
First, let's review some important limitations of readily available window capture methods in the most common operating systems.
A fairly simple solution to get around these limitations is to add logic that re-renders the target scene to an off-screen render target with a larger color and depth attachment. This method would probably suffice for most use cases. But what if we aim higher and try to capture a 32K i.e. 30720x17280 pixel screenshot?
If we want to create a render target with an 8-bit four channel color attachment and 32-bit floating point storage for depth, we're dealing with an over 4GB allocation on the GPU. This is fine for contemporary high-end GPUs, which typically house about 8-12GB of VRAM. However, as soon as we start to consider we may want to setup a multisampling (MSAA) render pass to reduce aliasing, we evidently run into memory bandwidth problems. An MSAA render pass comprises multi-sample color and depth attachments and a single resolve color attachment to store the result. This way, a render pass using e.g. 8 samples would already consume over 30GB of dedicated GPU storage, leaving us with little space for essential resources.
nap::Snapshot uses a tile-based rendering implementation to reduce the memory bandwidth of MSAA. The idea is to break up the capture operation in evenly distributed chunks, meaning e.g. 30720x17280 can be subdivied into 256 1920x1080 tiles. Rendering to each tile sequentially removes the need to allocate the multi-sample color and depth attachments at full resolution. Instead, we can allocate each of these resources at the size of a single 1920x1080 tile, and re-use them as we render the tiles consecutively.
That's a huge bandwidth reduction, and at an affordable time cost as the capture is less time-critical for our purposes!
nap::Snapshot exposes several properties for configuring the capture such as resolution, bit depth, file format, and tiling. The latter affects the number of tiles that will be used for distributing the rendering operation.
For each tile, we create a separate VkFrameBuffer to group the memory attachments needed for executing a VkRenderPass. In our capture implementation, VkFrameBuffer's color resolve attachments will always reference a unique color texture, whereas their color and depth attachments will refer to identical texture memory. As all render commands that are submitted to the command buffer—such as our tile render passes—are completed out-of-order, we must synchronize the commands to ensure that the shared resources are not accessed by multiple render passes concurrently.
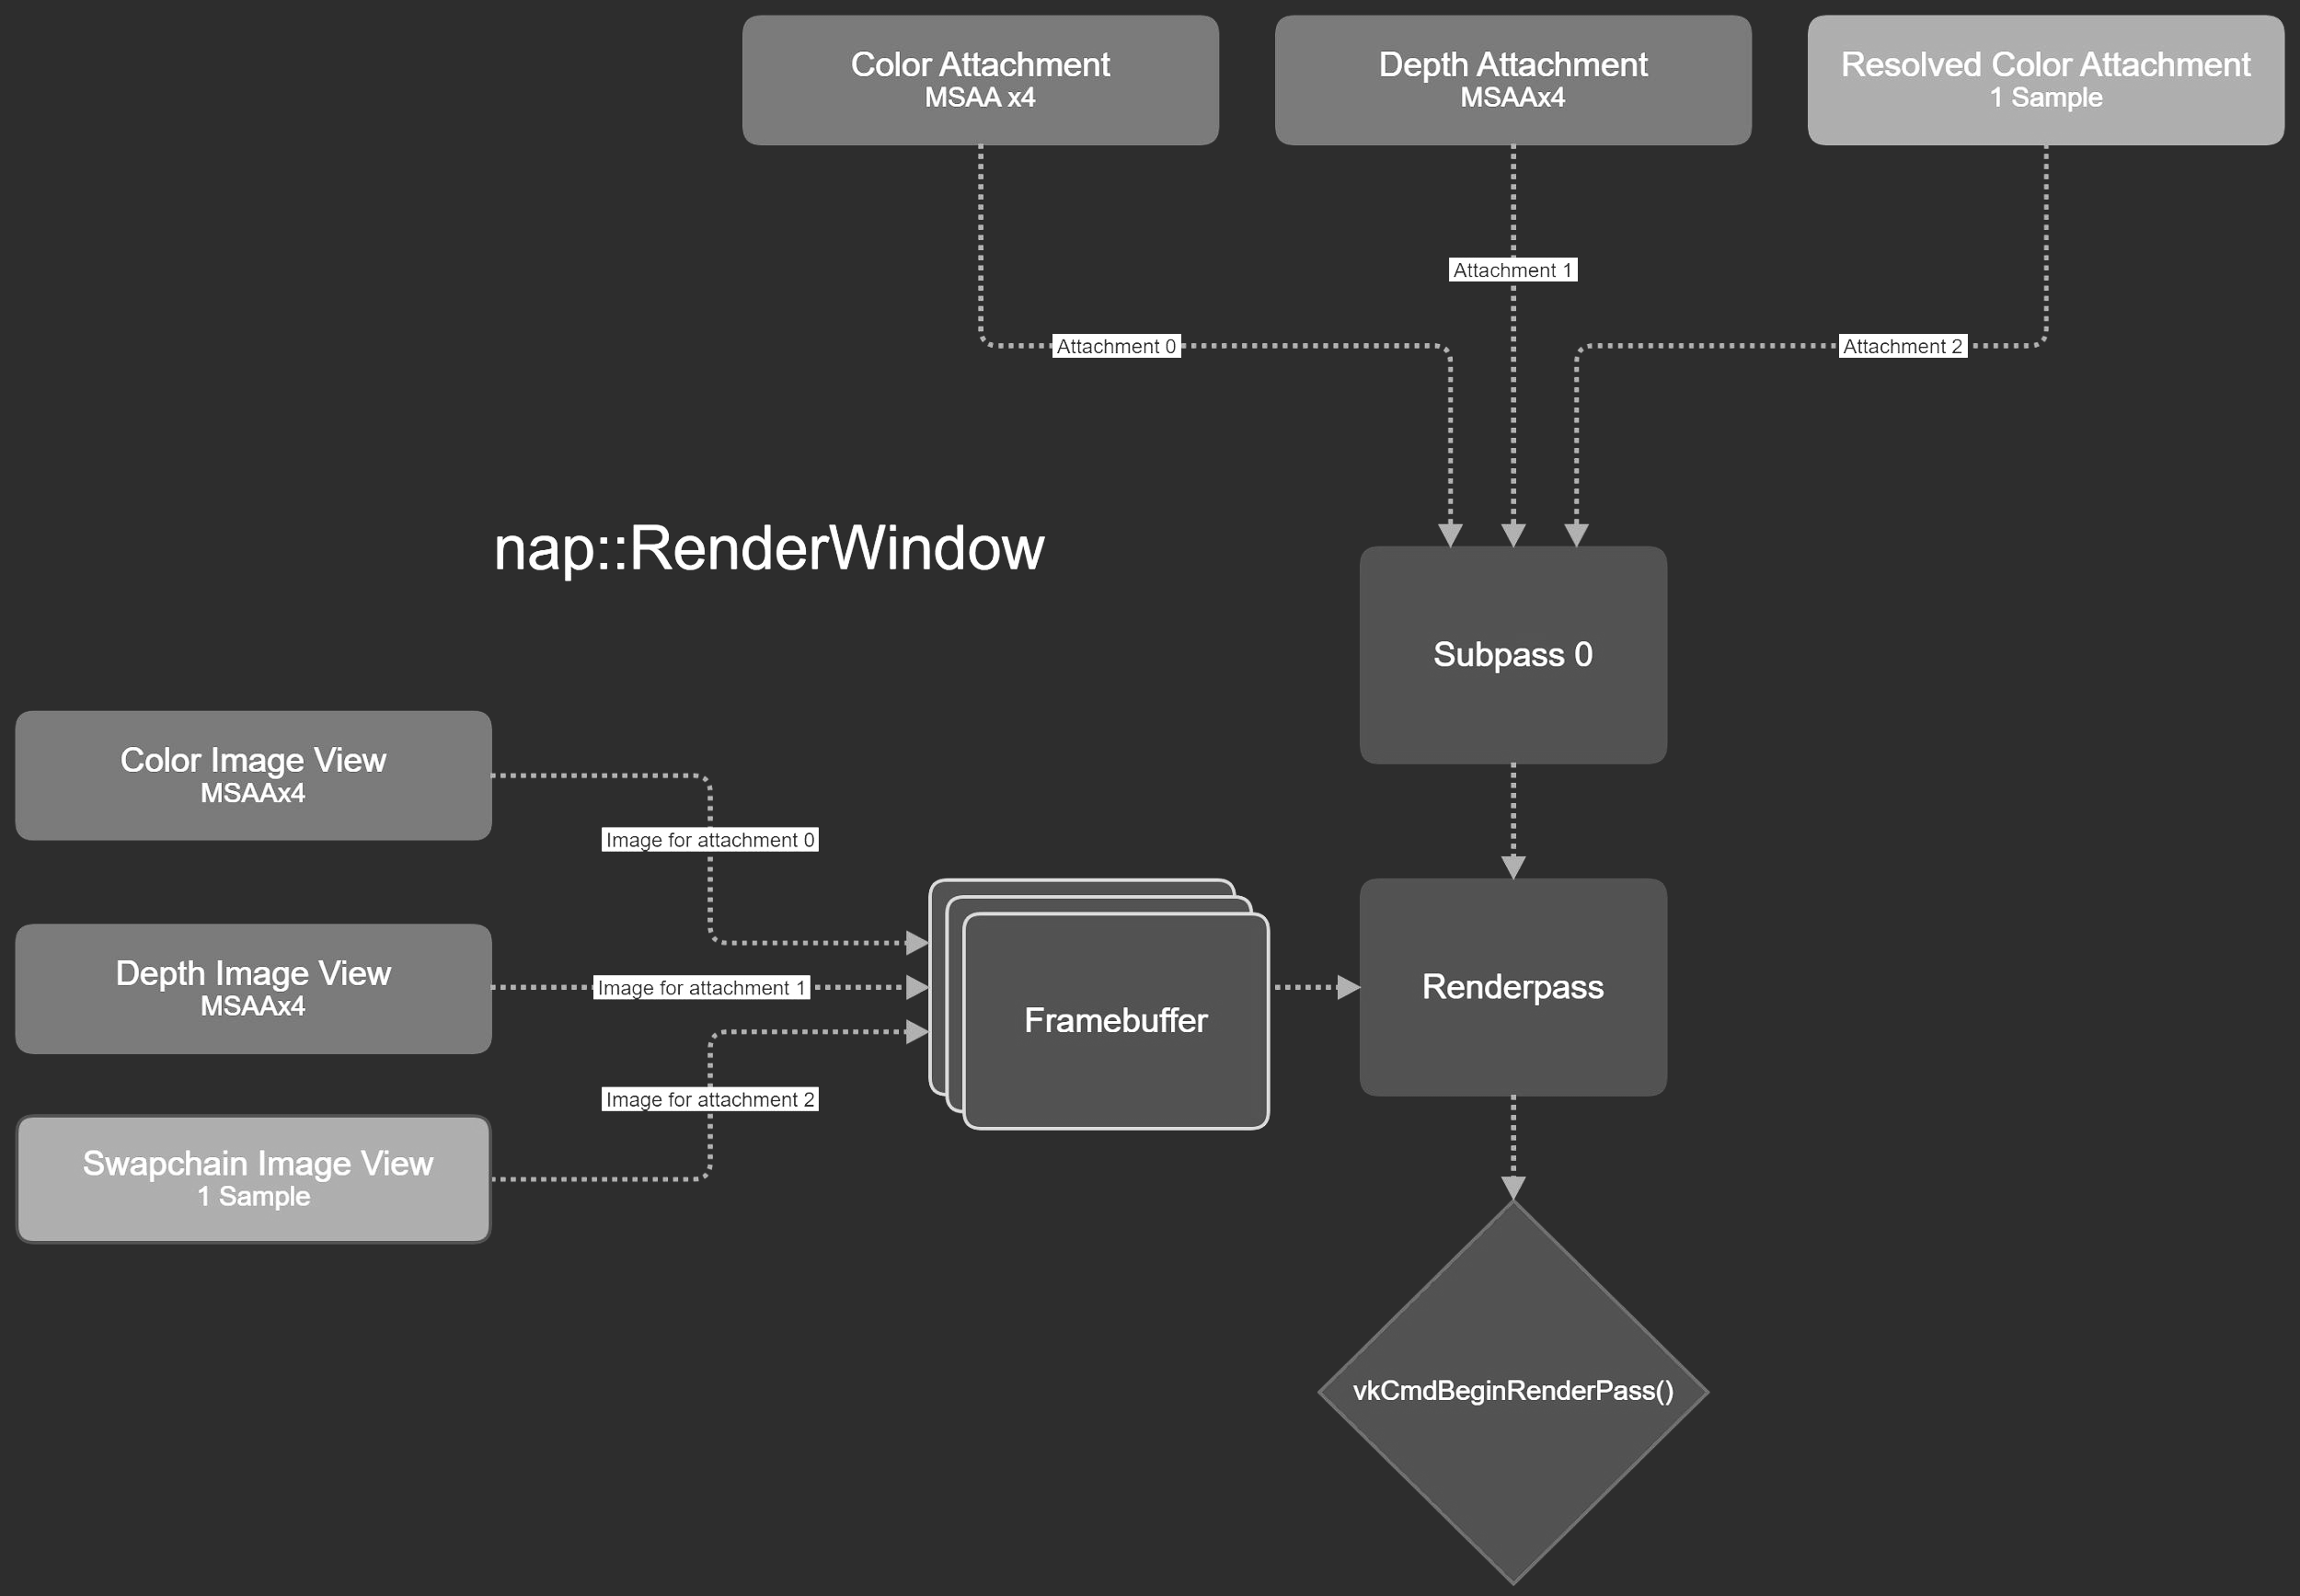
Vulkan allows us to specify strict dependencies between render passes by configuring execution and memory barriers in VkSubpassDependency structs. In this case, the rendering operations involved with a single tile only depend on the availability of the color and depth attachments for writing.
To describe our tile synchronization procedure, we first setup a VkRenderPass struct with the appropriate subpass and attachment descriptions. Then, we create a VkSubpassDependency. Here, we set srcStageMask and dstStageMask to the pipeline stages that will be accessing the color (PIPELINE_STAGE_COLOR_ATTACHMENT_OUTPUT) and depth attachments (PIPELINE_STAGE_EARLY_FRAGMENT_TESTS and PIPELINE_STAGE_LATE_FRAGMENT_TESTS). By way of explanation, the current dst render pass must await this particular set of stages in the src render pass before it may execute the set. We also set srcAccessMask and dstAccessMask such that read and write access to the color and depth attachments is blocked: ACCESS_COLOR_ATTACHMENT_WRITE, ACCESS_DEPTH_STENCIL_ATTACHMENT_READ etc. Finally, we set srcSubPass to VK_SUBPASS_EXTERNAL so that the current render pass (dstSubpass = 0) depends on anything submitted to the command buffer before it, in our case, command for preceding tiles. Putting everything together in vkCreateRenderPass returns our VkRenderPass which we cache to use with different VkFrameBuffer's later.
Calling Snapshot::snap() in an application's render() method will capture a given list of render components using the perspective camera passed in as an argument.
For each tile, the projection matrix of the given camera is used to rebuild a frustum with an off-axis projection that lines up with their window into the scene. Then, the tile draw commands are pushed to the headless command buffer with their associated projection matrices. After all render passes have finished, we wait until the end of the current frame before downloading the textures from the GPU to their staging buffers. Finally, each tile is directly copied from their staging buffer into a full-size image file buffer to be saved to disk!
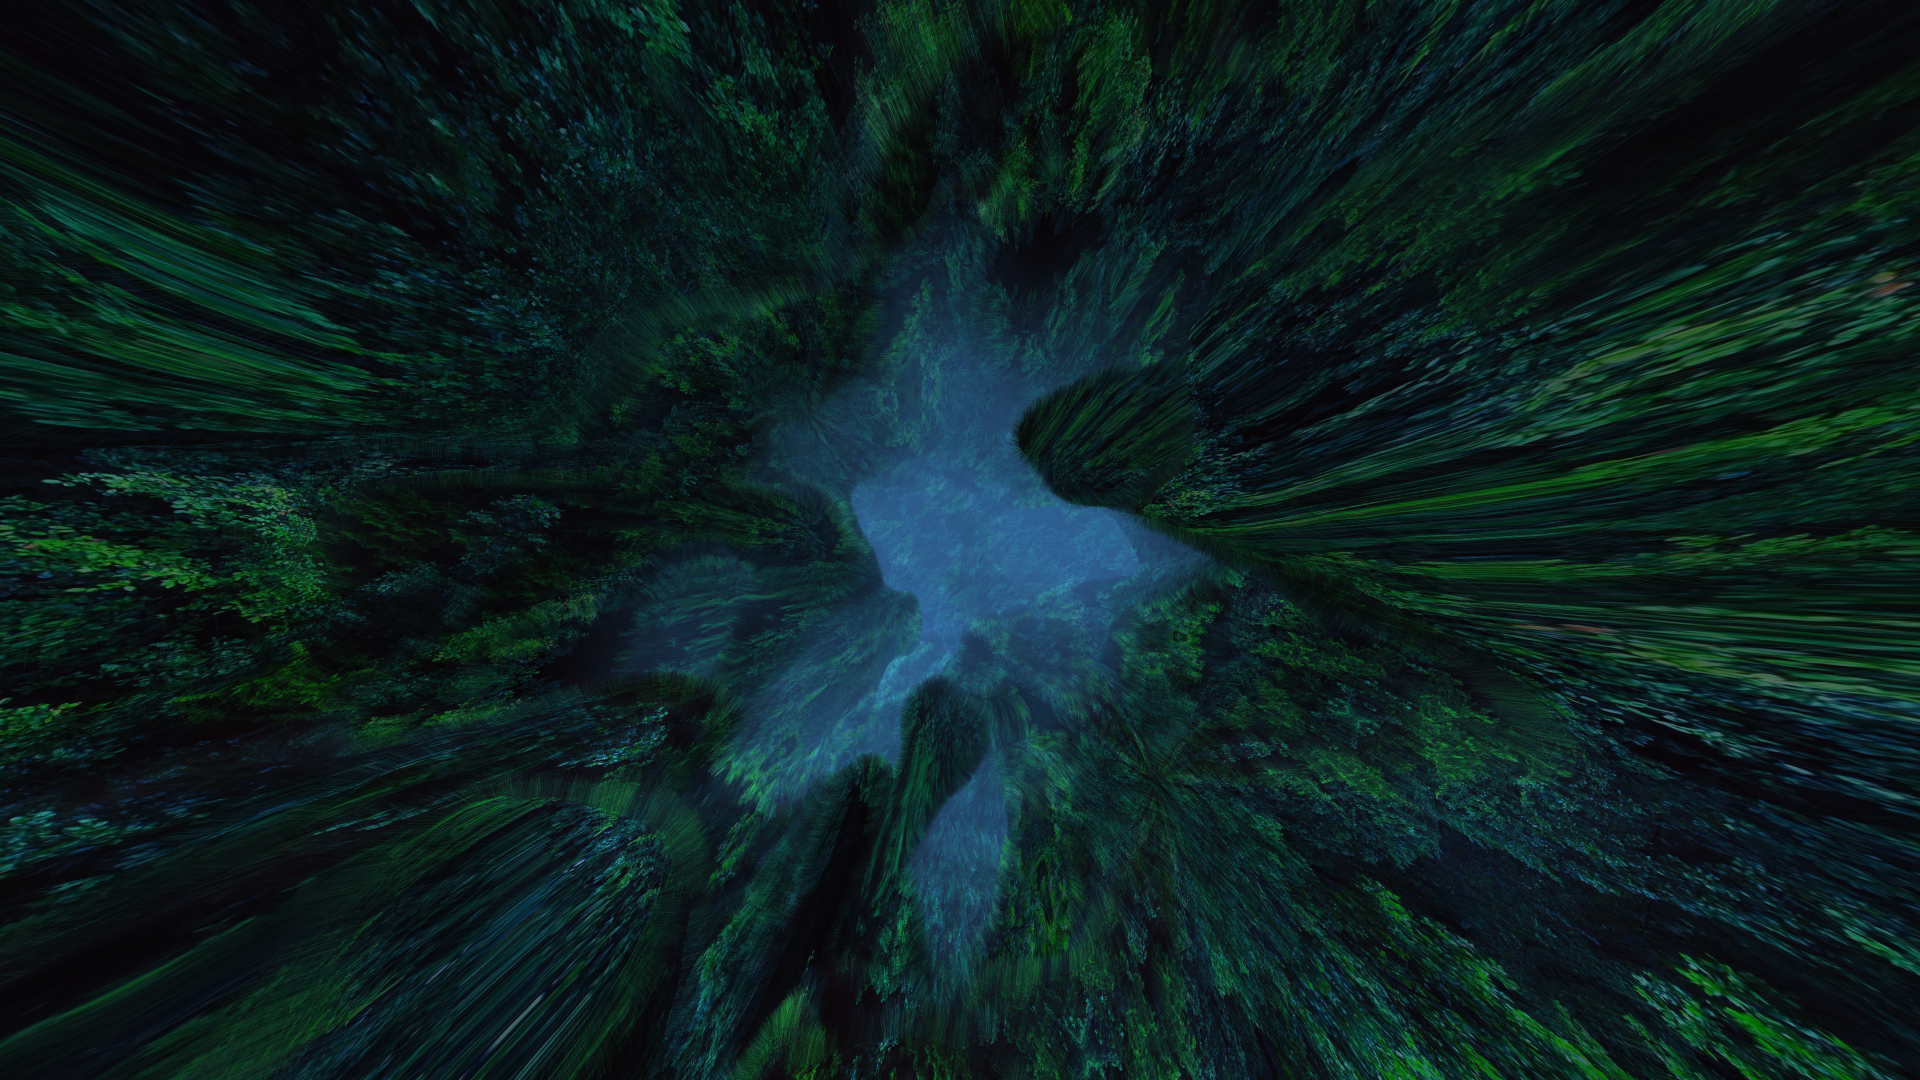
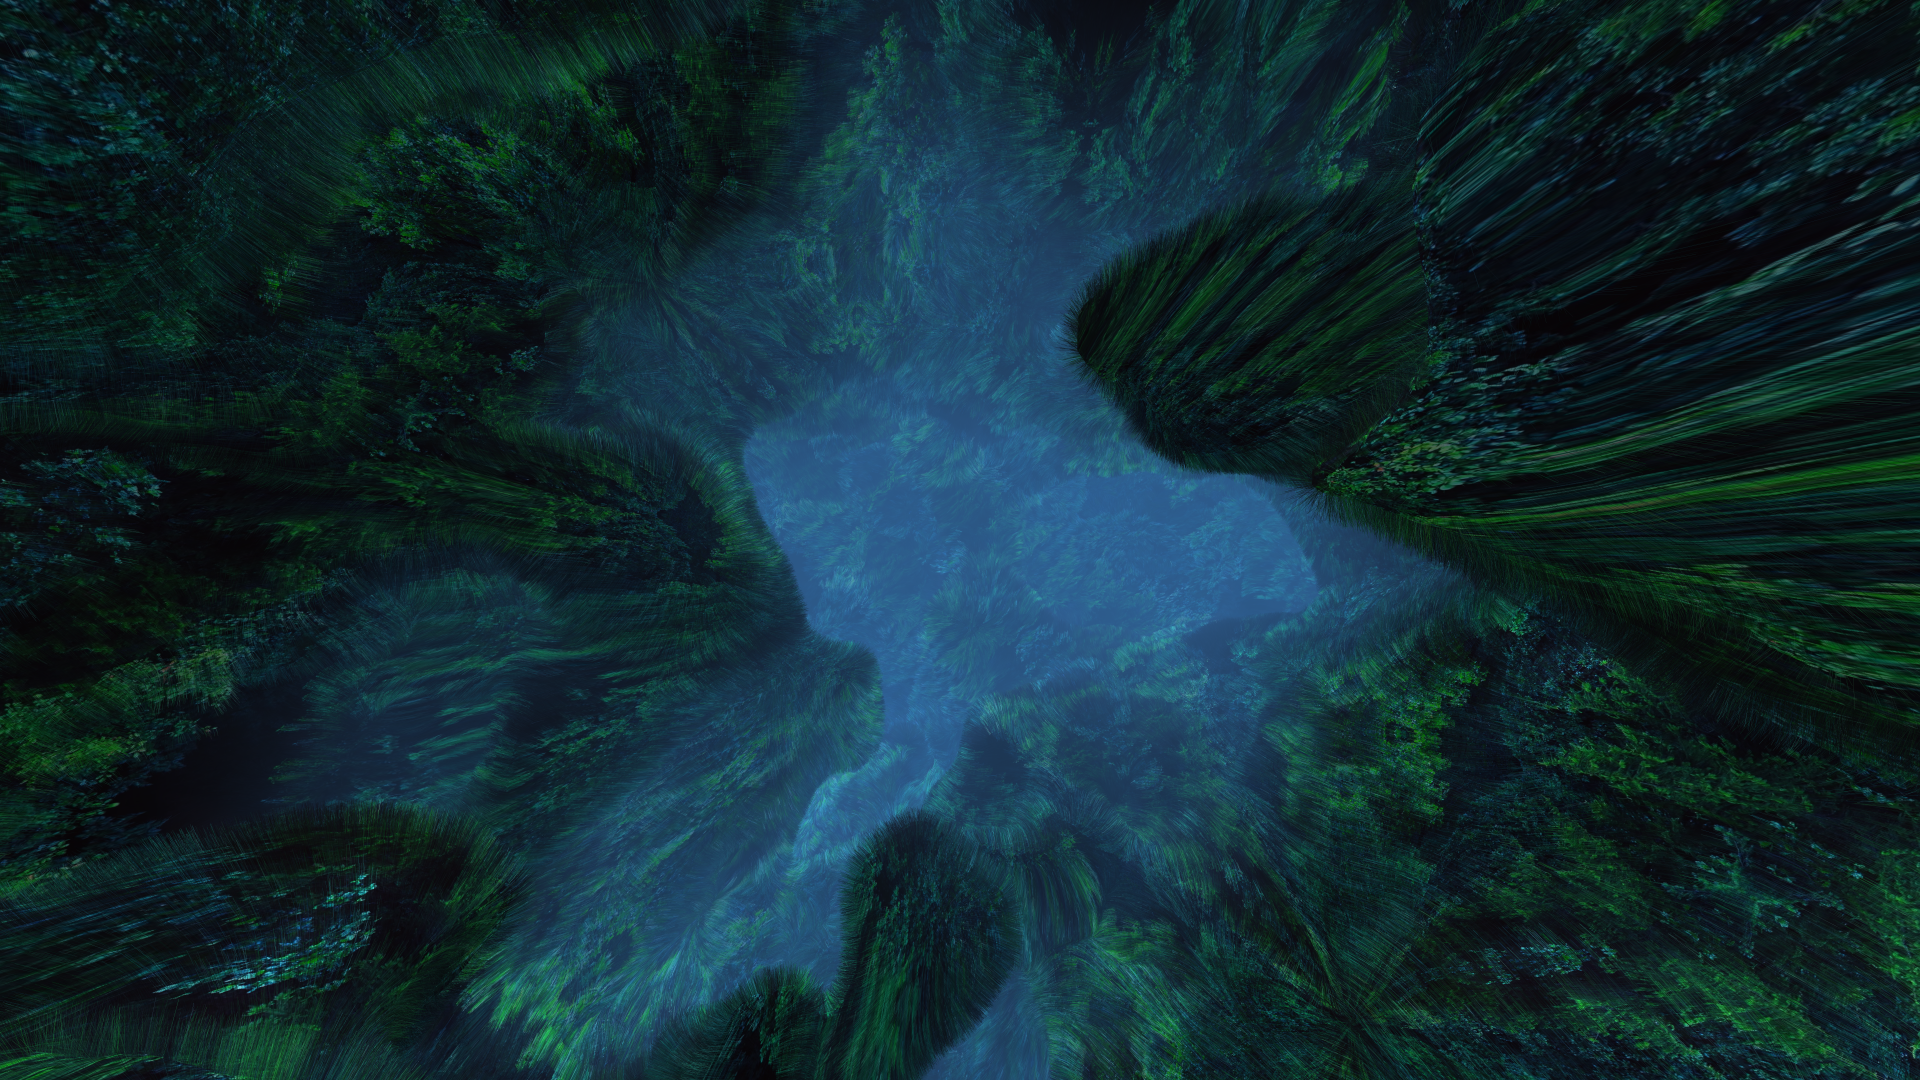
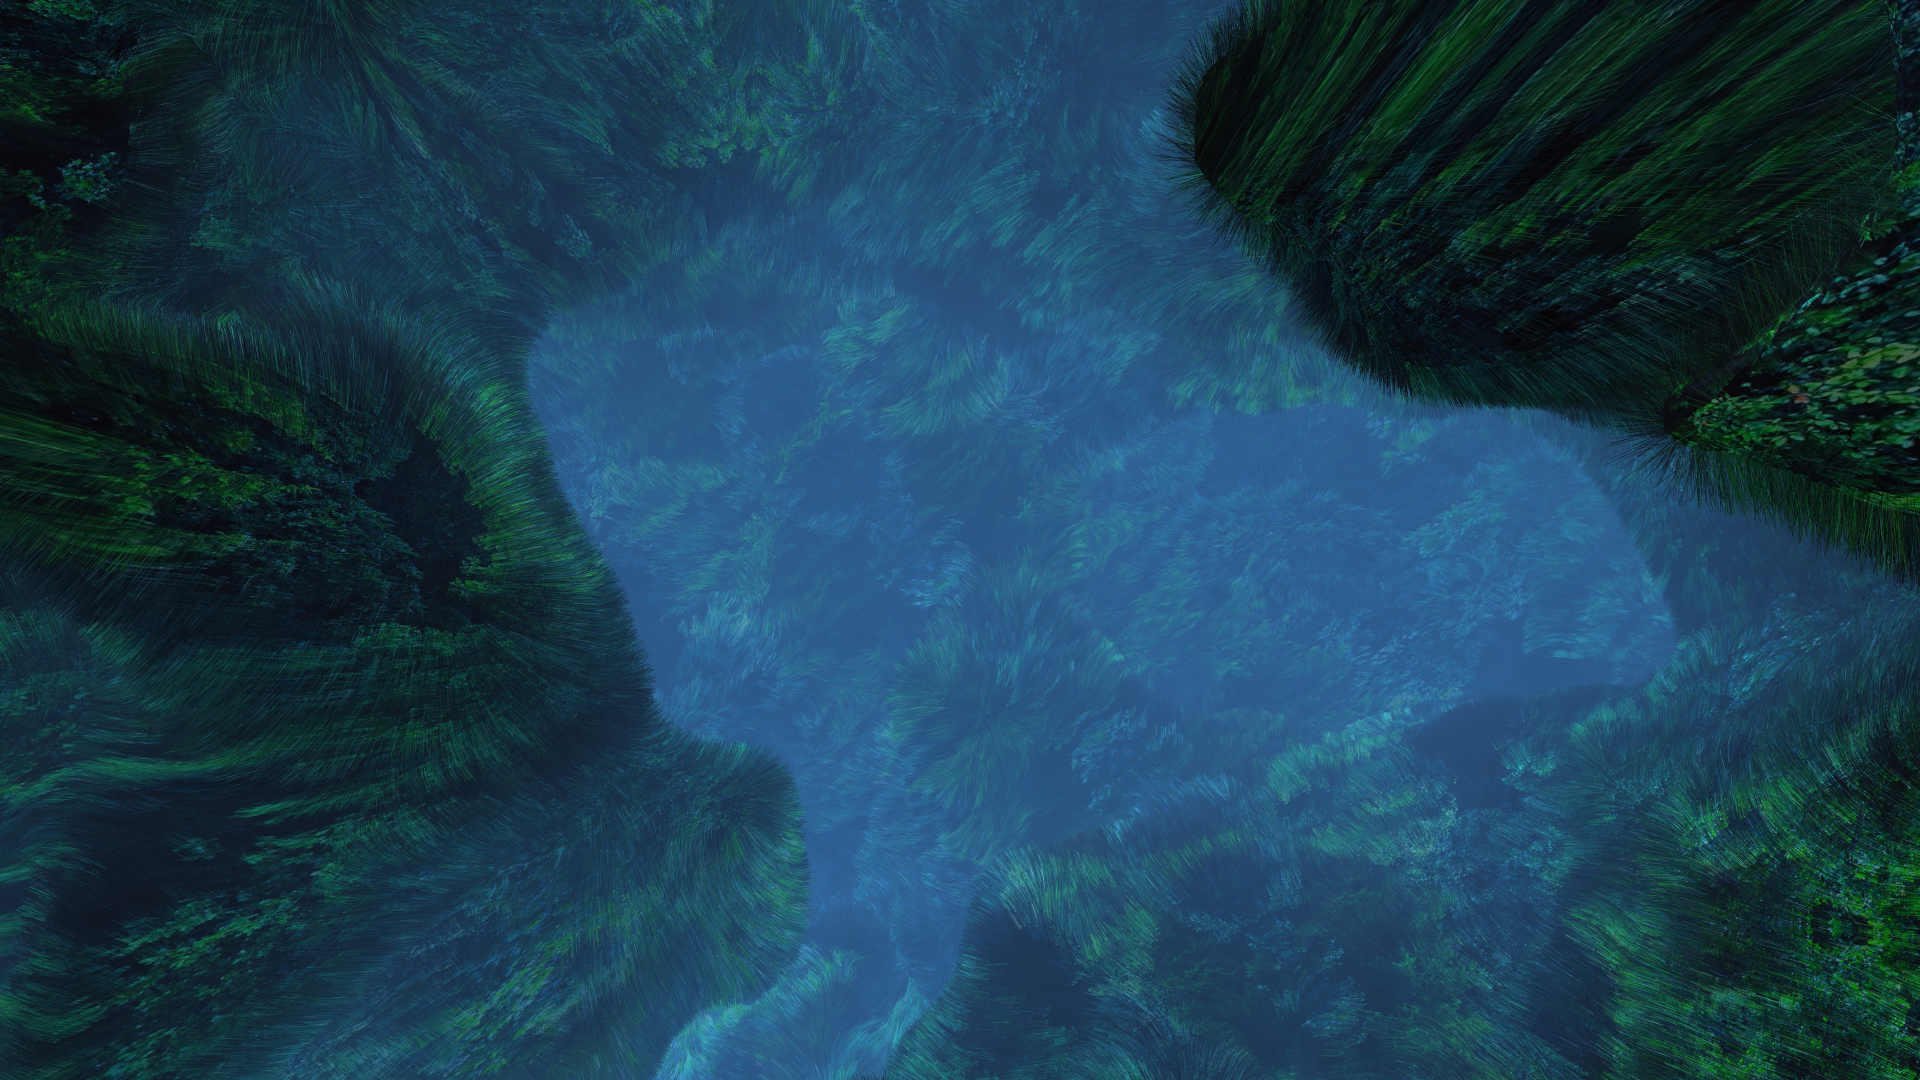
To really put nap::Snapshot to the test, I needed a highly complex scene with lots detail. This made the installation Habitat by Heleen Blanken, built on NAP, the ideal testing ground for this feature. I wrote about this project's port from NAP 0.3 (OpenGL) to 0.4 (Vulkan) in a previous blog post. Habitat uses dynamically generated hair meshes which are distributed evenly on the surface of complex geometry. Due to the flexible nature of this system, it is desirable to use VRAM sparingly to leave room for as many hairs as possible, especially as the capture resolution increases!
Habitat by Heleen Blanken is currently on view at the Nxt museum in Amsterdam.
I captured a Habitat scene comprising at least 25 million vertices and a texture-mapped 4K video. The capture is 32K rendered with MSAAx8 on a NVIDIA Geforce GTX 1660 6GB Super. We cannot publish the full-resolution PNG as it is over 650MB in size. Therefore, I created a set of web-friendly crops to demonstrate the result instead.


Using a 16x16 grid, the capture operation was divided into 256 tile render passes to resolve attachments of 1920x1080. The complete snapshot was rendered and written to disk in roughly 4 seconds. That is a pretty fair trade-off between memory and processing time.
An example of how to use nap::Snapshot is included in the vinyl demo. NAP Framework is open source software. Suggestions and contributions are welcome.
Lesley van Hoek | Software Engineer Naivi
