With the release of NAP 0.5 and official Vulkan support on the Raspberry PI 4 it is now possible to build, develop and run NAP applications on the Raspberry PI 4.
Performance is quite impressive (most demo apps run at about +- 80-90 fps) however I do recommend to overclock your Pi to get some extra performance boost.
Working with an existing IDE or text editor on the Raspberry PI itself can be (really) slow and cumbersome, and you will probably miss a lot of features modern C++ IDE's give you. That's why in this tutorial I want to explain how to use Clion as your IDE on your Desktop PC while it compiles & debugs on the RPi 4 using Clion's full remote mode feature.
With full remote mode, you can work on a macOS, Linux, or Windows desktop targeting a remote Linux machine connected via SSH, in this case the RPi 4.
The first decision you have to make is whether you want to work from the NAP package or directly from NAP source. When new to NAP development I recommend working from the NAP package since this will be easier to setup and you don't need to compile NAP yourself saving you time. You can easily create new NAP applications or compile and run the demos and play around with all of the NAP features. The packaged NAP version is tested and will provide you with a solid set of tools to begin building your own applications. To begin working from NAP package download the current NAP package for Raspbian, set up your Pi for NAP development and continue reading from Working from nap package.
You can also choose to work directly from source. This will give you the ability to modify the NAP source code and the ability to create your own NAP modules if you like. Setting up your Pi and Clion to work with full remote mode will involve a couple of more steps. To work from source, set up your Pi for NAP development and continue reading from Working from nap source.
Prior to setting up your raspberry Pi for NAP Development and Clion remote deployment, make sure you meet the following prerequisites.
For this blog post we use the most recent version of Raspbian (which at the time of writing is Raspbian GNU/Linux 11 (bullseye)). To install the most recent version of Raspbian we recommend using the rpi-imager tool which you can download from the raspberry pi website.
NAP almost works out-of-the box with Raspbian. A couple of simple steps need to be taken to setup Raspbian to work with NAP.
To use 'full remote mode' in Clion we need to enable SSH and since NAP uses the Vulkan API as render backend we need to install the vulkan driver. Furthermore we need to install patchelf.
Once your device boots up:
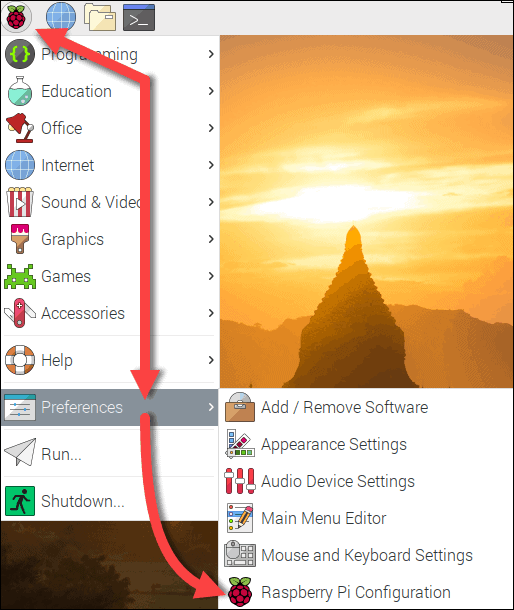
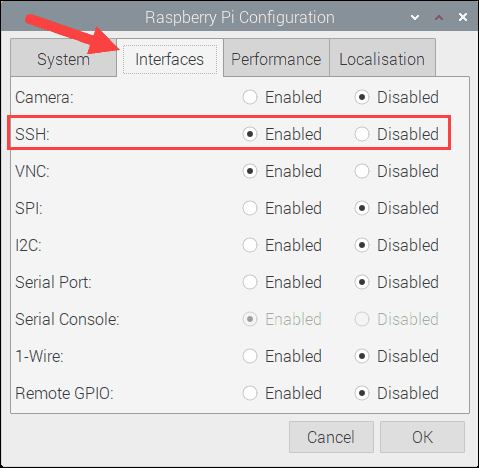
That's it. Your Raspberry Pi is now accessible via SSH. This will enable Clion to access the Pi via your local network.
With Raspbian Bullseye you need to install the Vulkan drivers provided by the Mesa project.
Open a new terminal and type the following lines
Reboot your system after a successful install.
Now run sh check_build_environment.sh script to verify your build environment is up to date for NAP development. The script can be found in the tools directory when working from NAP package and in the root when compiling NAP from source. The script checks if the hardware and operating system is supported and installs all missing depencies for you. After installation The raspberry PI should be ready for NAP development.
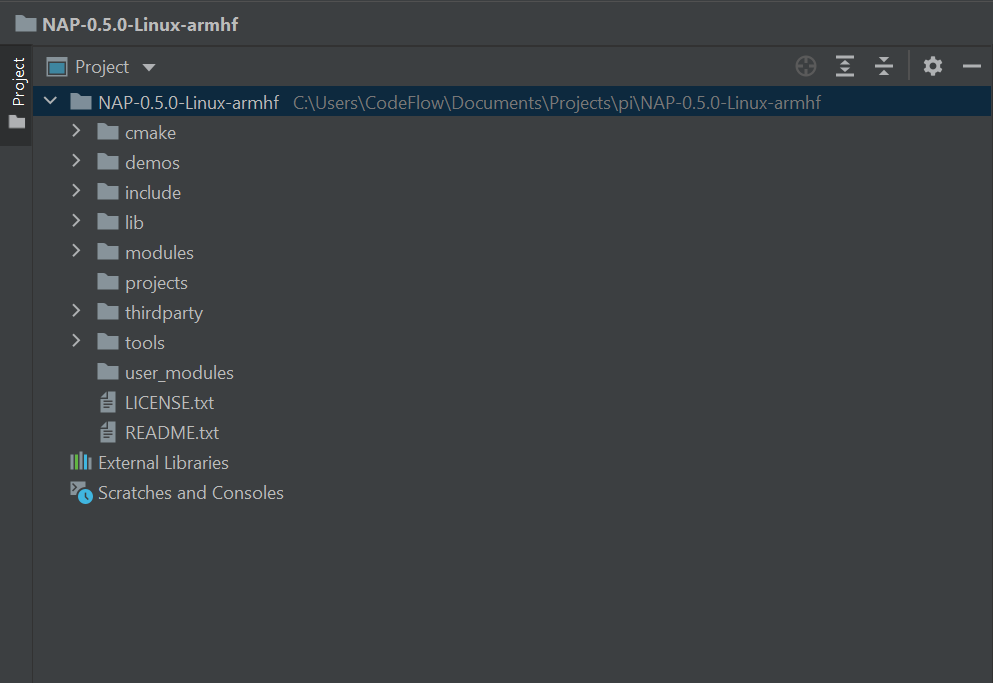
After completing all steps in set up your Pi for NAP development you can download & extract the current NAP package on your development PC from which you will use Clion. When done open Clion and open the NAP package folder. When done your Clion project hierarchy should look like this.
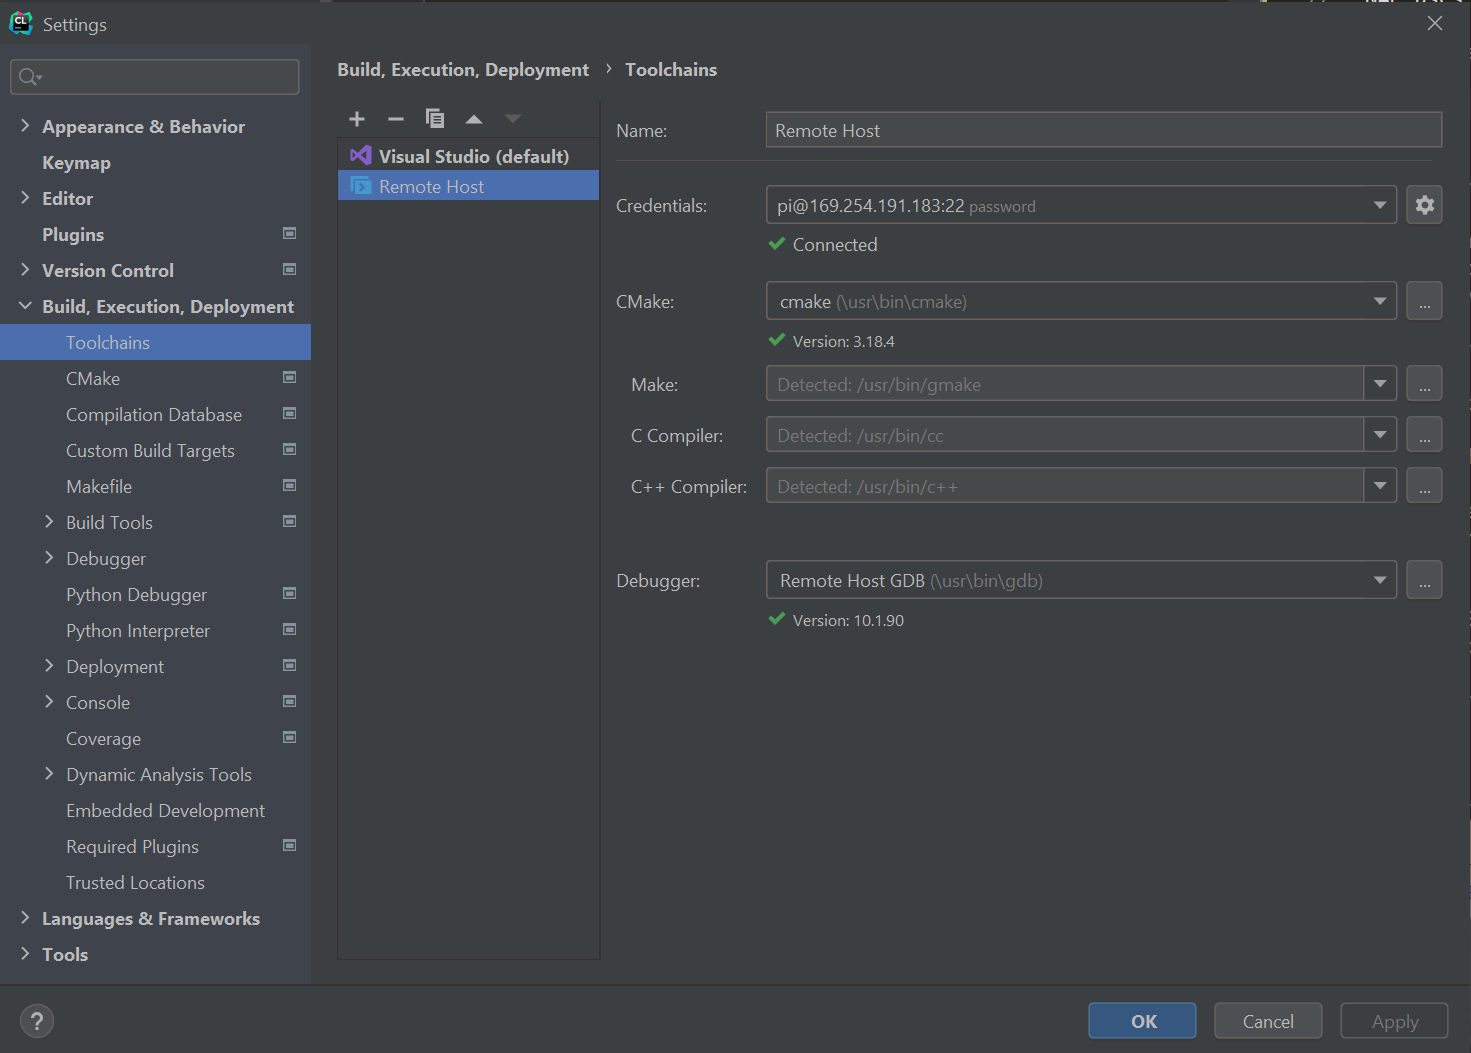
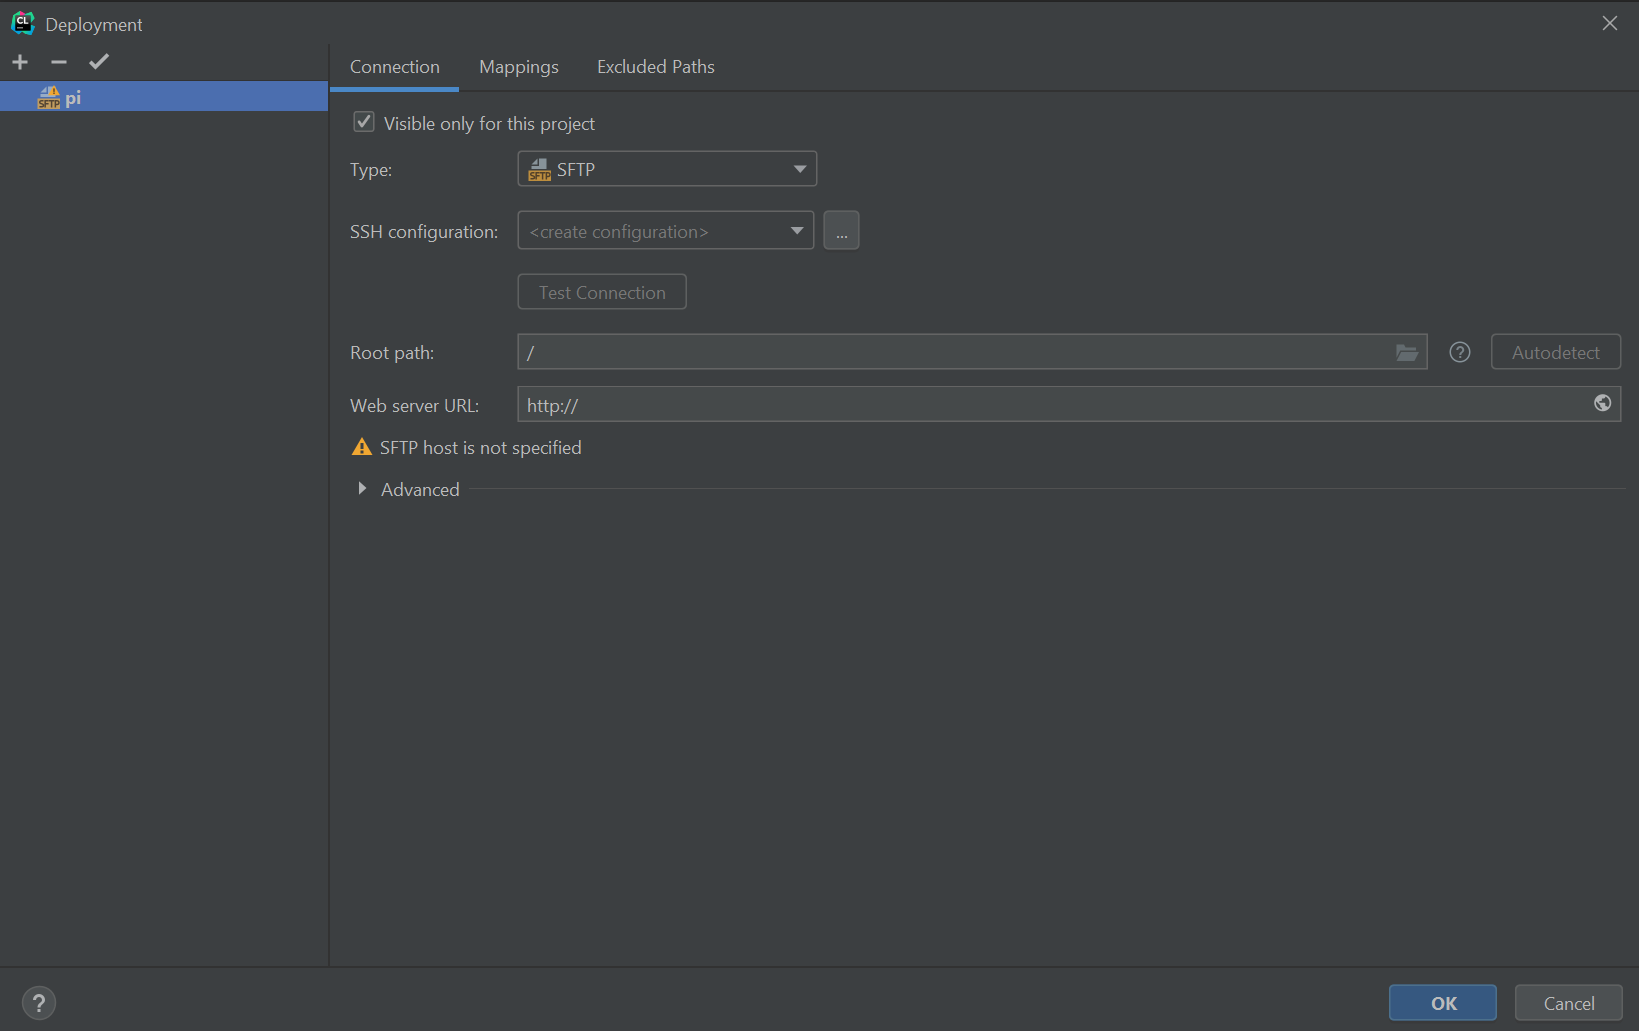
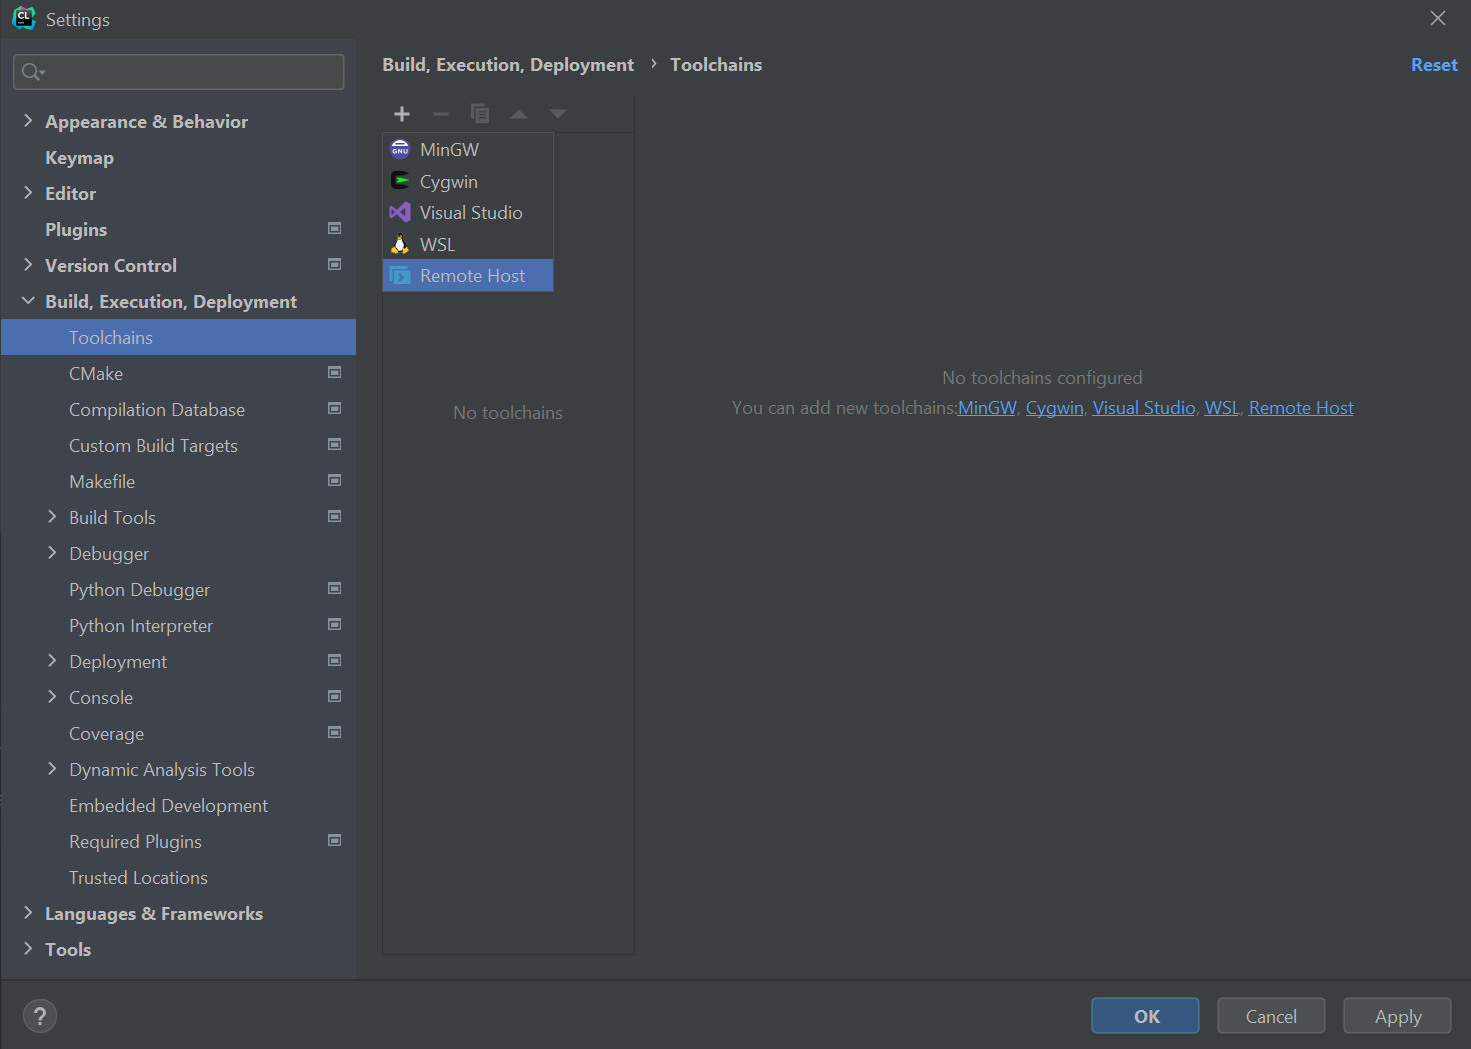
Now it is time to setup a new toolchain for remote deployment. Navigate to Settings > Build, Execution, Deployment > Toolchains and add a new toolchain by clicking on the + button. Select Remote Host. Here we need to add the Pi credentials. Click on the gear icon to add the Pi credentials.
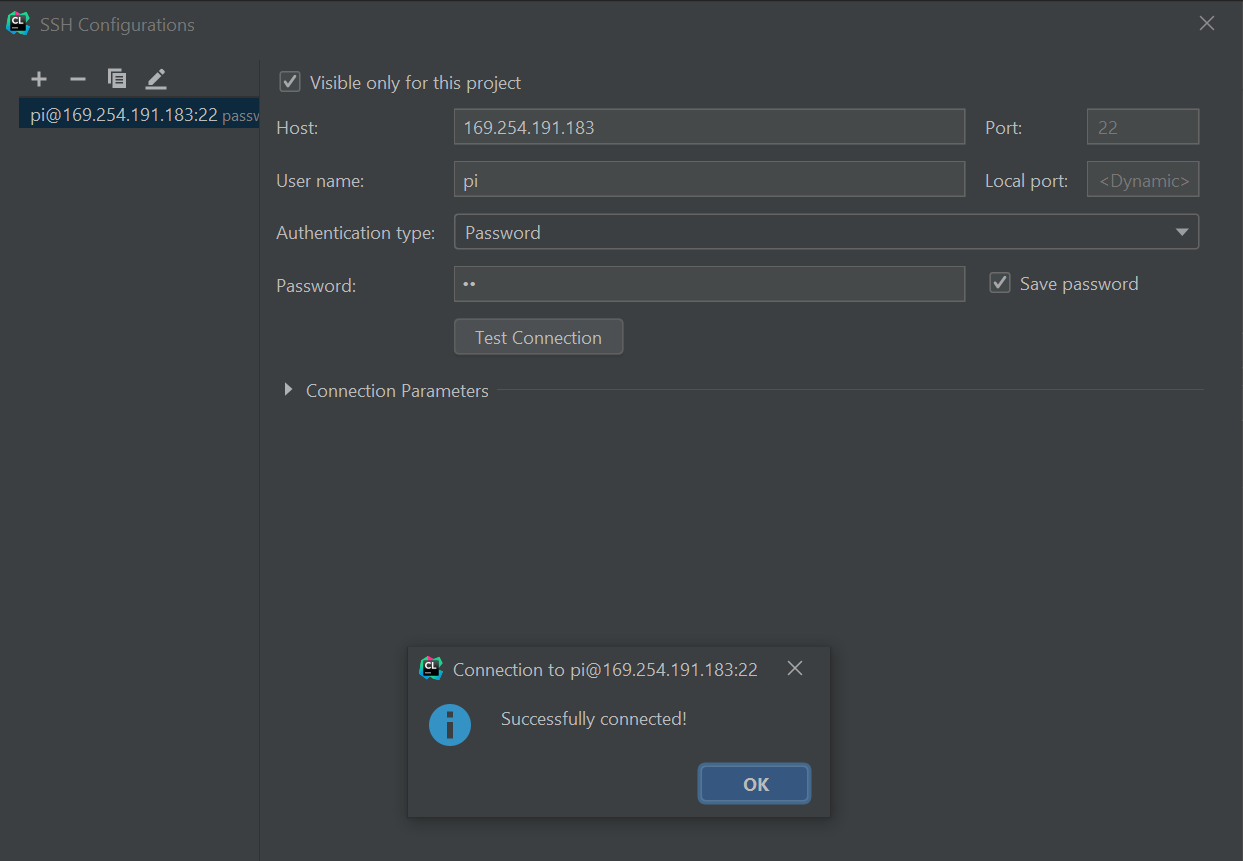
In the SSH Configurations window add a new configuration and enter the correct IP and credentials. Once done, click on 'Test Connection' to make sure Clion can connect with your Pi using SSH.
Once successful. Click on OK and continue. You should now have a Remote Host as a toolchain configured. Change the name to "Remote Pi" if you like for more clarity and set it as the default toolchain.
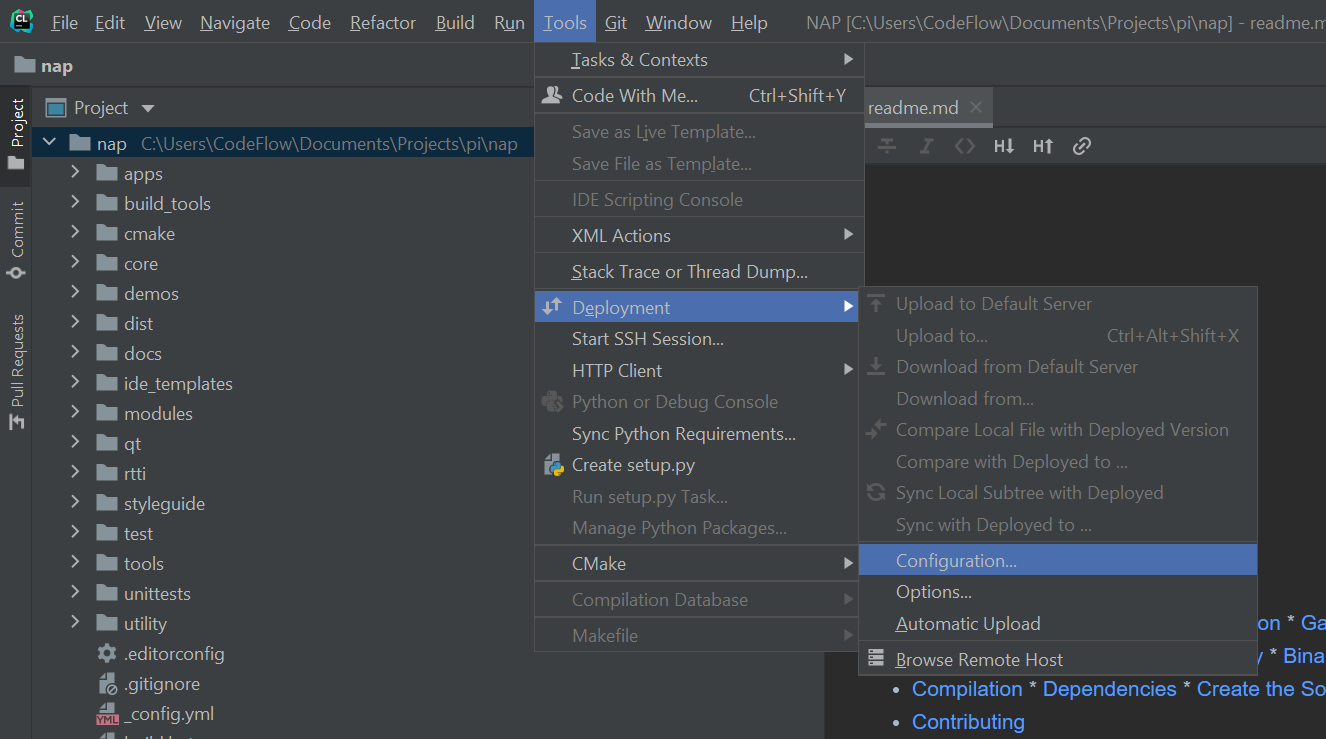
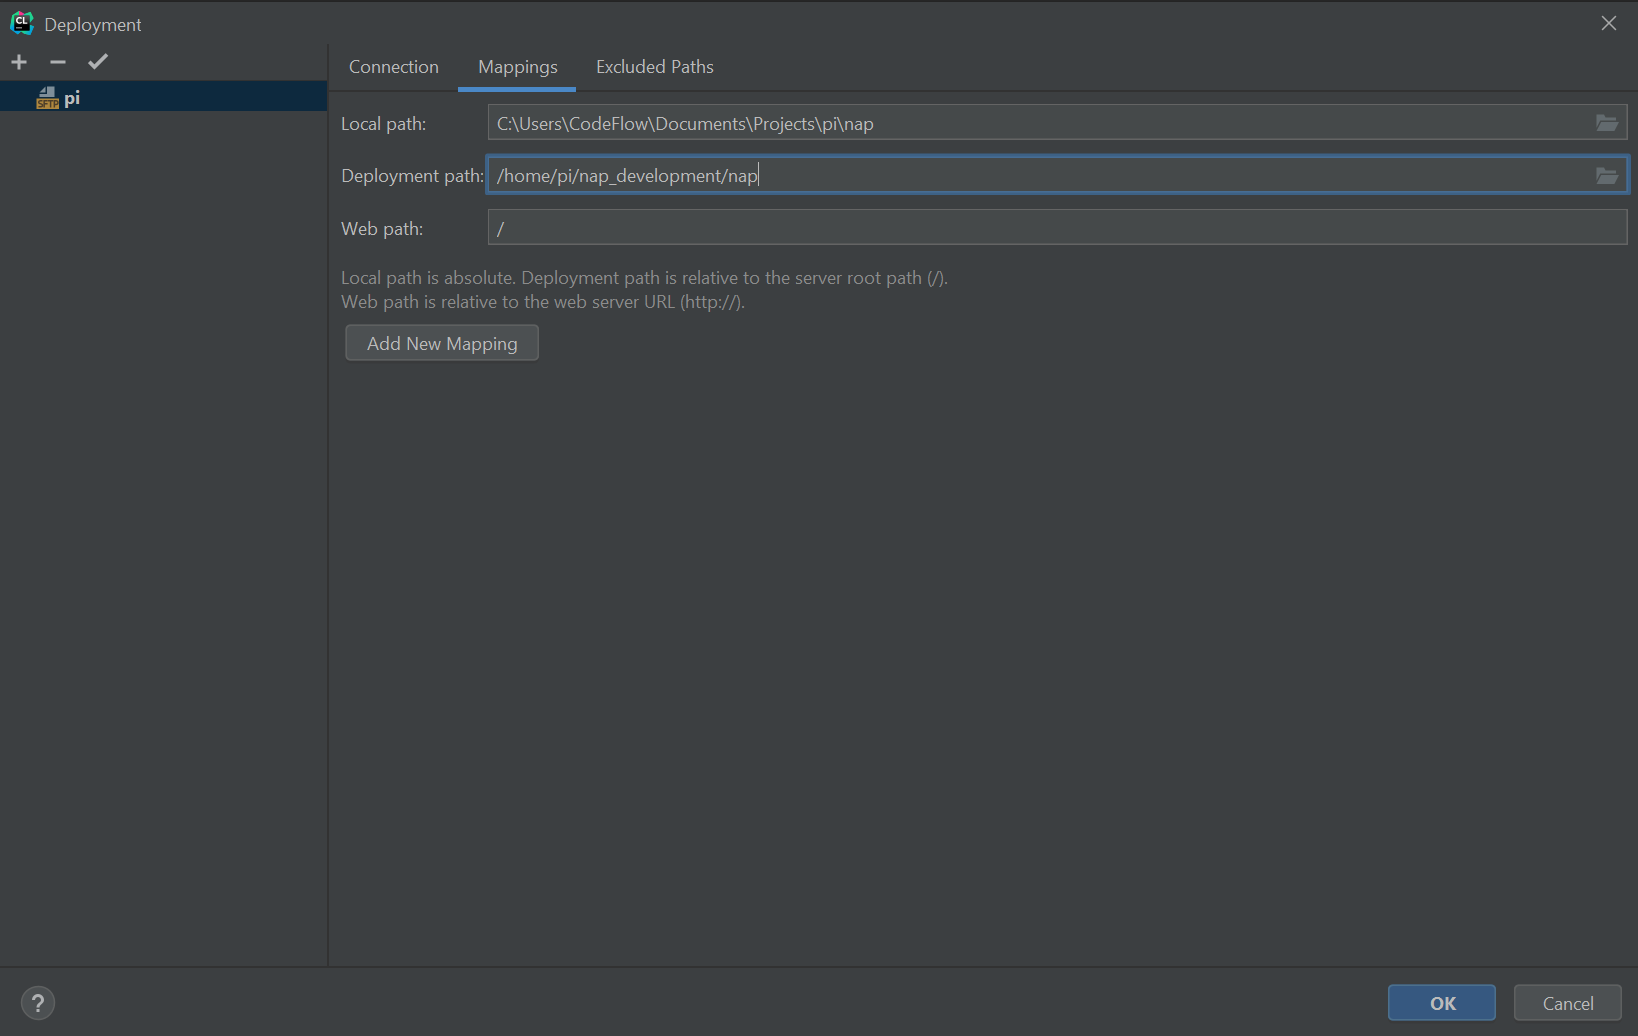
Clion now needs to sync the extracted NAP package directory with a directory somewhere on your Pi. In order to do this we need to setup mapping correctly. Open the deployment window by clicking on Tools > Deployment > Configuration. In the Deployment window select the created deployment target and navigate to mappings. Change the deployment path of the cloned NAP package directory on your development PC to a new nap directory somewhere on your Pi.
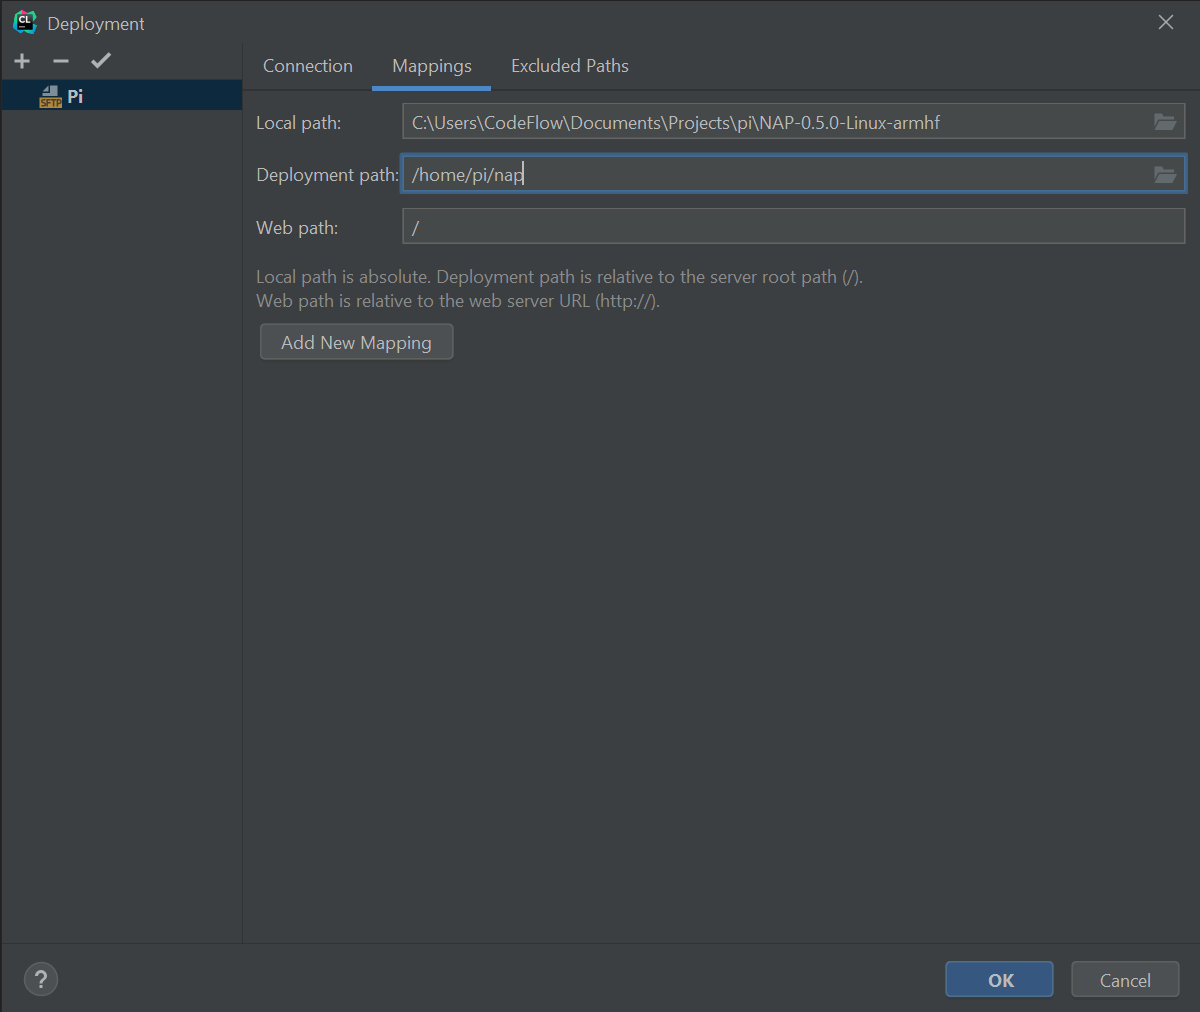
Click OK and continue.
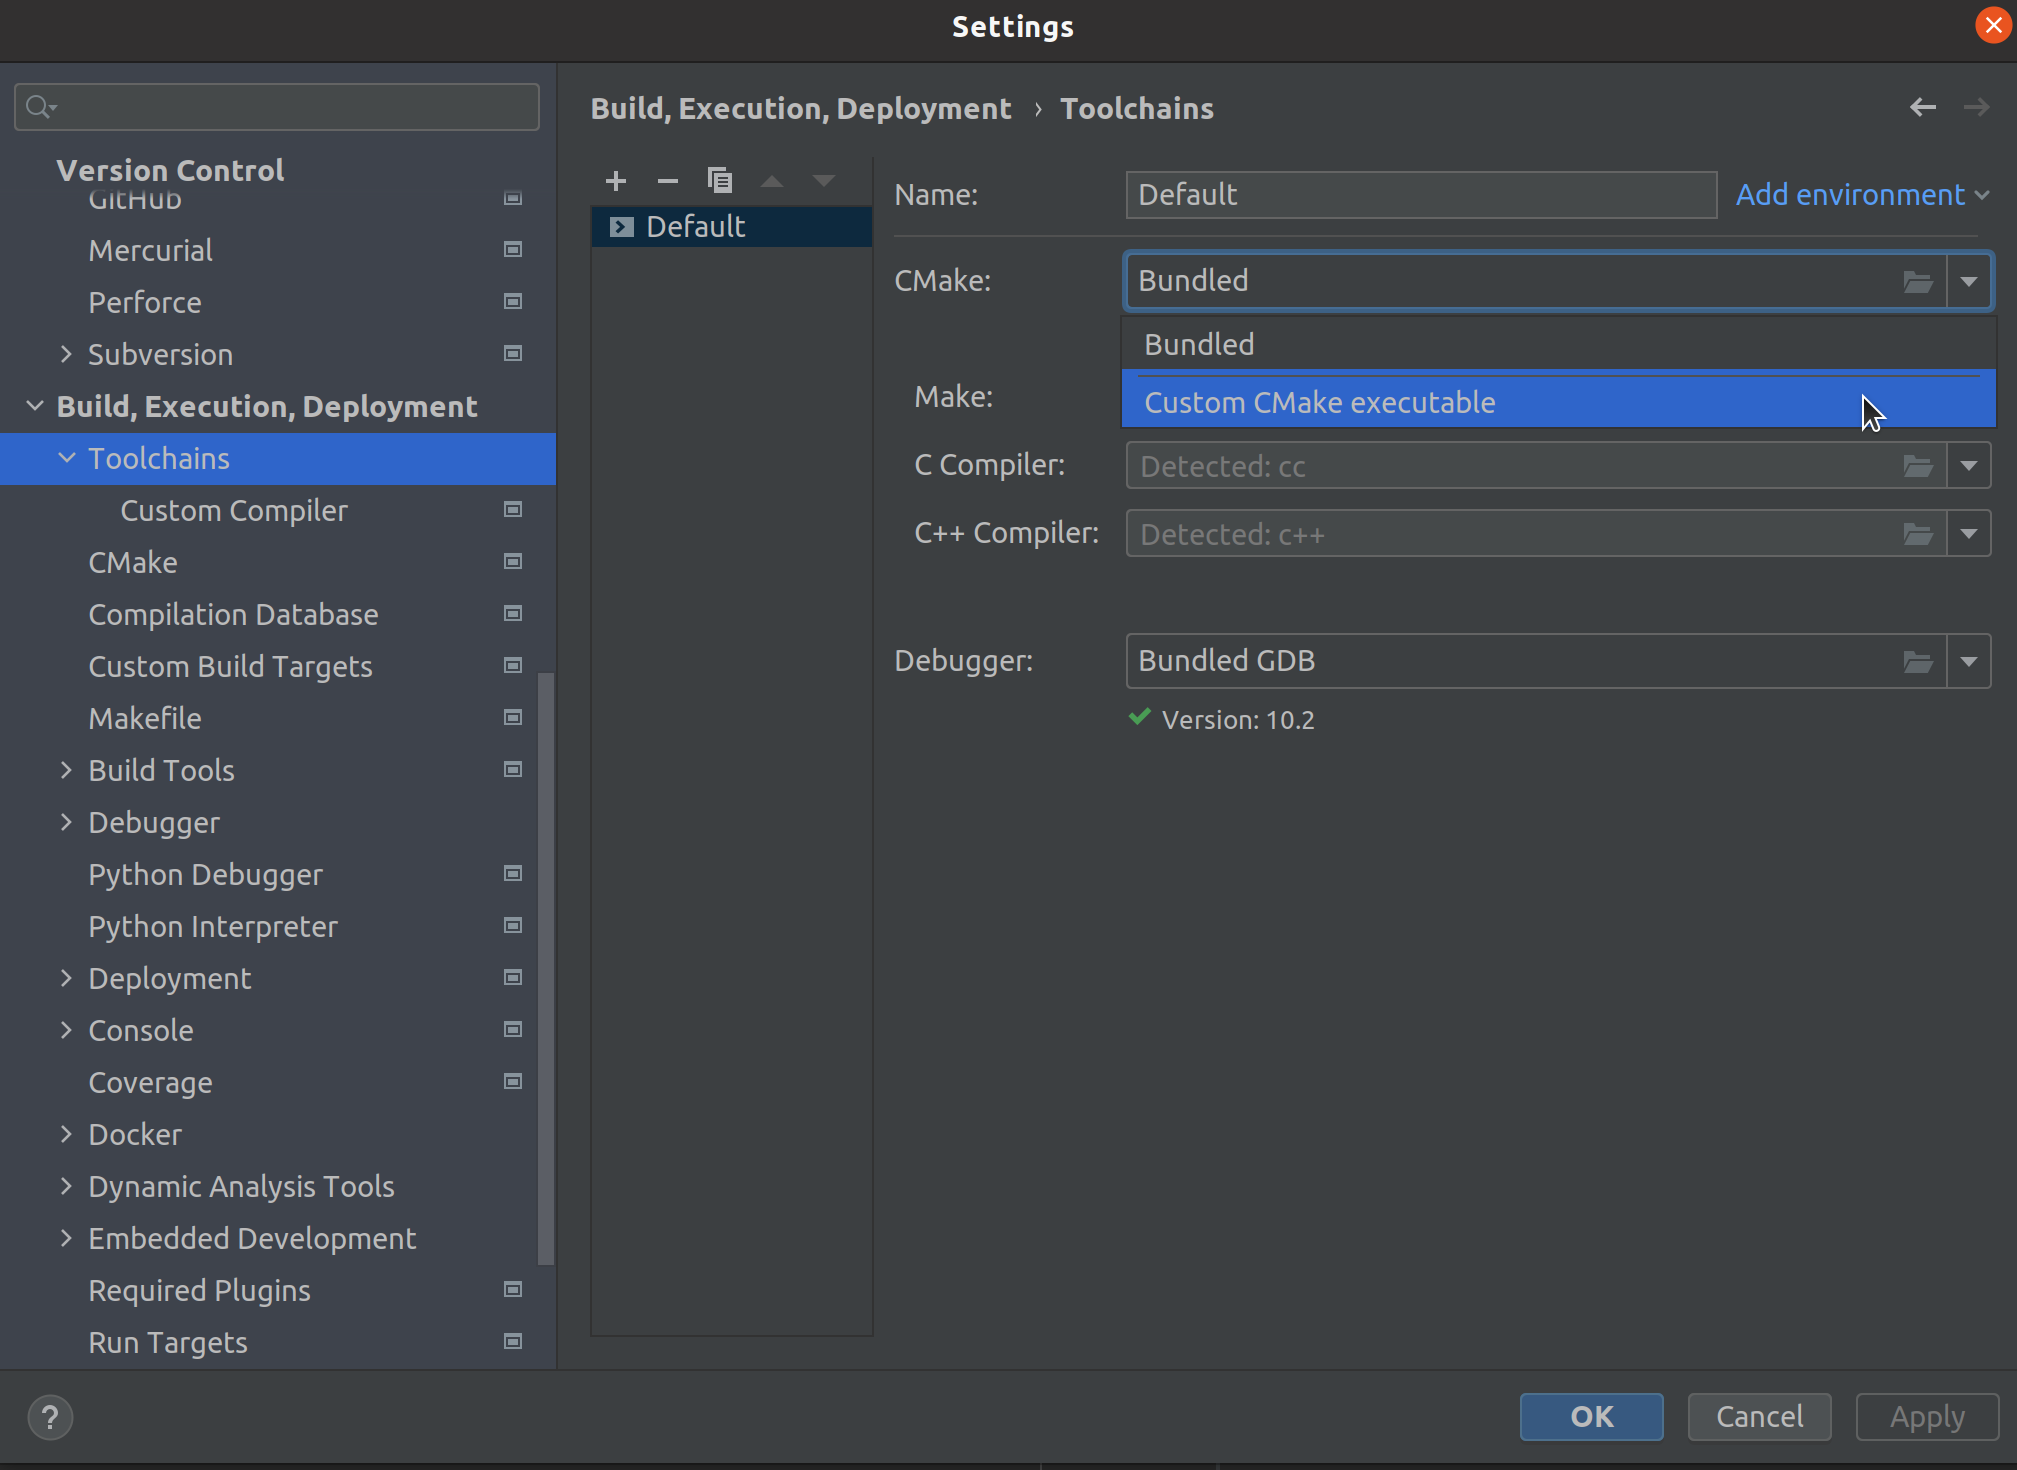
Clion will use the CMake version installed on the raspberry pi by default. If there is an older version of CMake installed on the raspberry pi this can cause issues. Packaged NAP ships with its own CMake version. You can tell Clion to use this version of CMake.
Go to Settings > Build, Execution, Deployment > ToolsChains. Select Custom and instead of bundled choose Custom Cmake Executable. Browse to the correct CMake installed in the thirdparty directory of the extracted packaged NAP.
This is the last step. You should now be able to load a demo, compile it and run it on the pi.
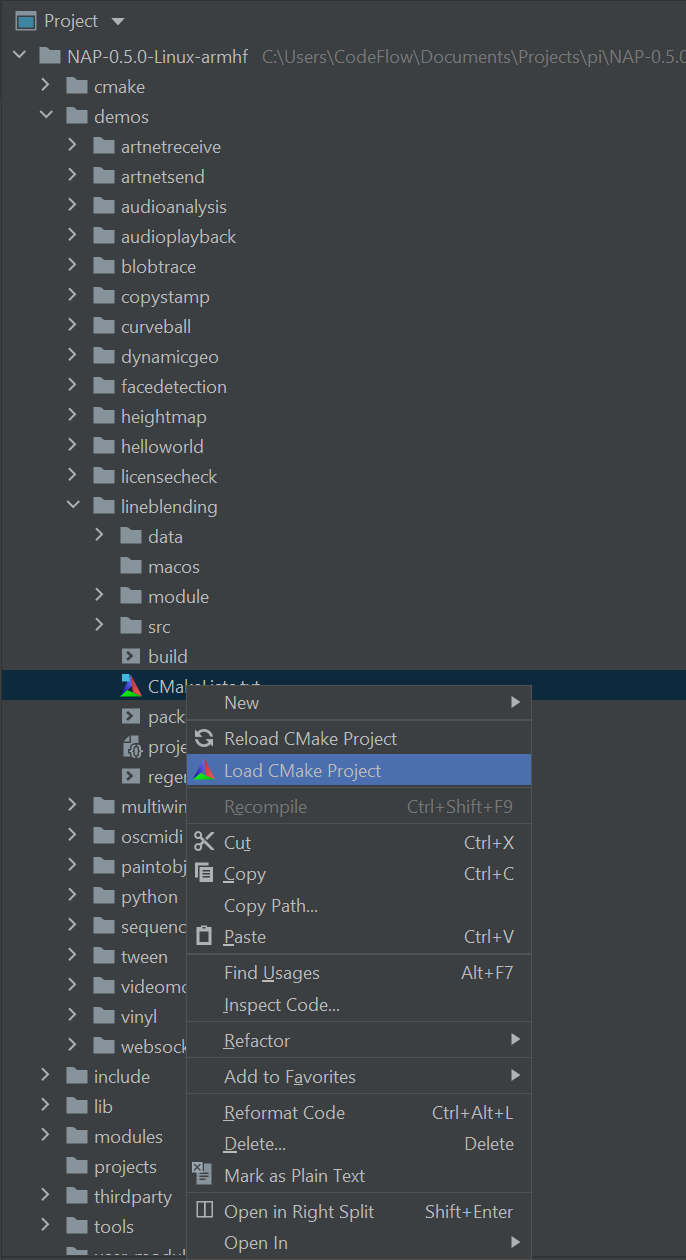
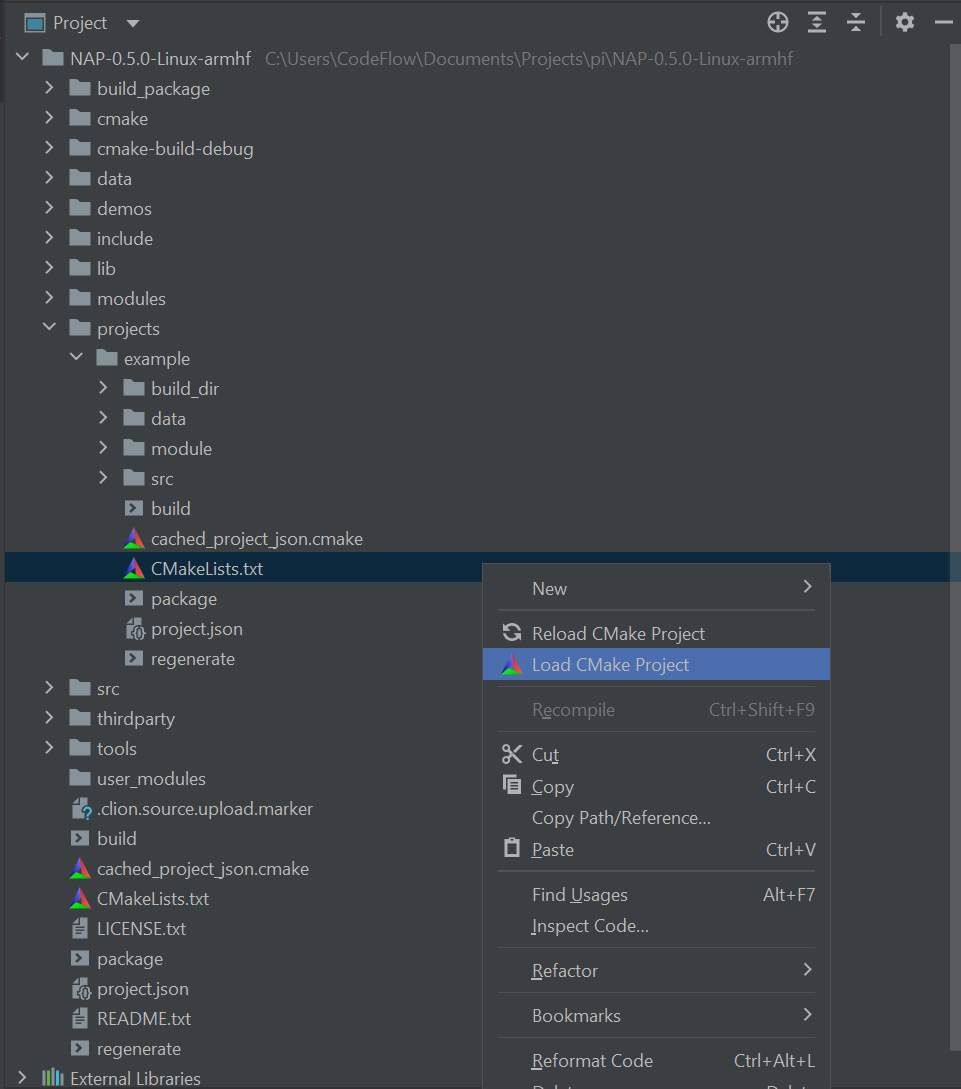
You should now be able to compile and run a demo. In this tutorial we will compile & run the lineblending demo. Navigate to the CMakeLists.txt file in the project view and click on load CMake Project.
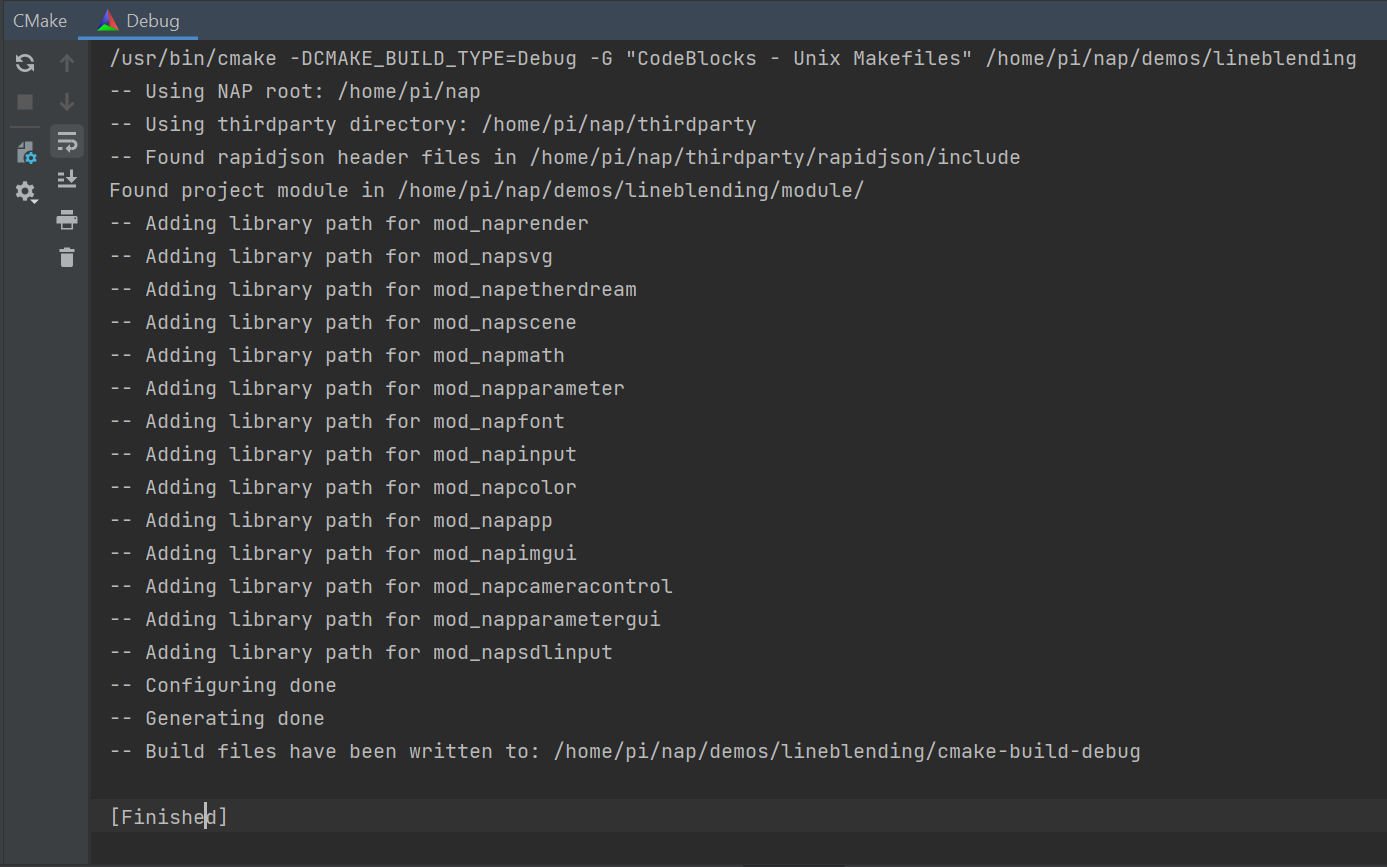
First CLion will upload all the necessary files from your project to you Pi using SSH. Wait for the upload. When upload is successful you should see something like this.

Now all files are synced with the Pi and CMake will generate the necessary project files.
Now you should be able to compile & run the lineblending demo app on the Pi from your CLion IDE. Click on Debug 'lineblending' on the upper right side of the Clion IDE to start compiling.

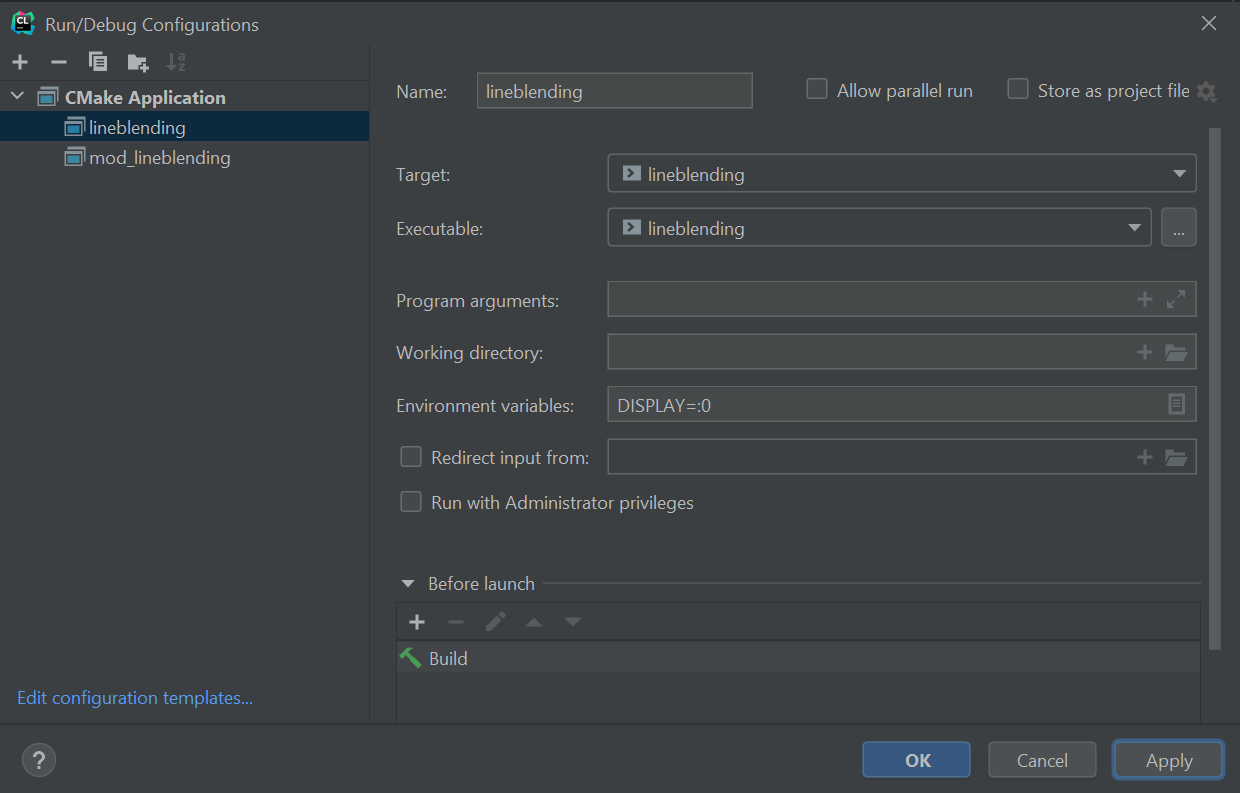
Because the build application is launched via SSH it cannot find the default display and RenderService will fail on initialization. We have to set an environment variable in order for the RenderService to initialize and display a window on screen.

Go to Edit Configurations on the upper right side of the Clion window.
In the Run/Debug configurations window you can set the environment variables for the target that you want to build. If you want to set it to the first display set it to
If you have multiple displays connected, you can change 0 to another index of a connected display.
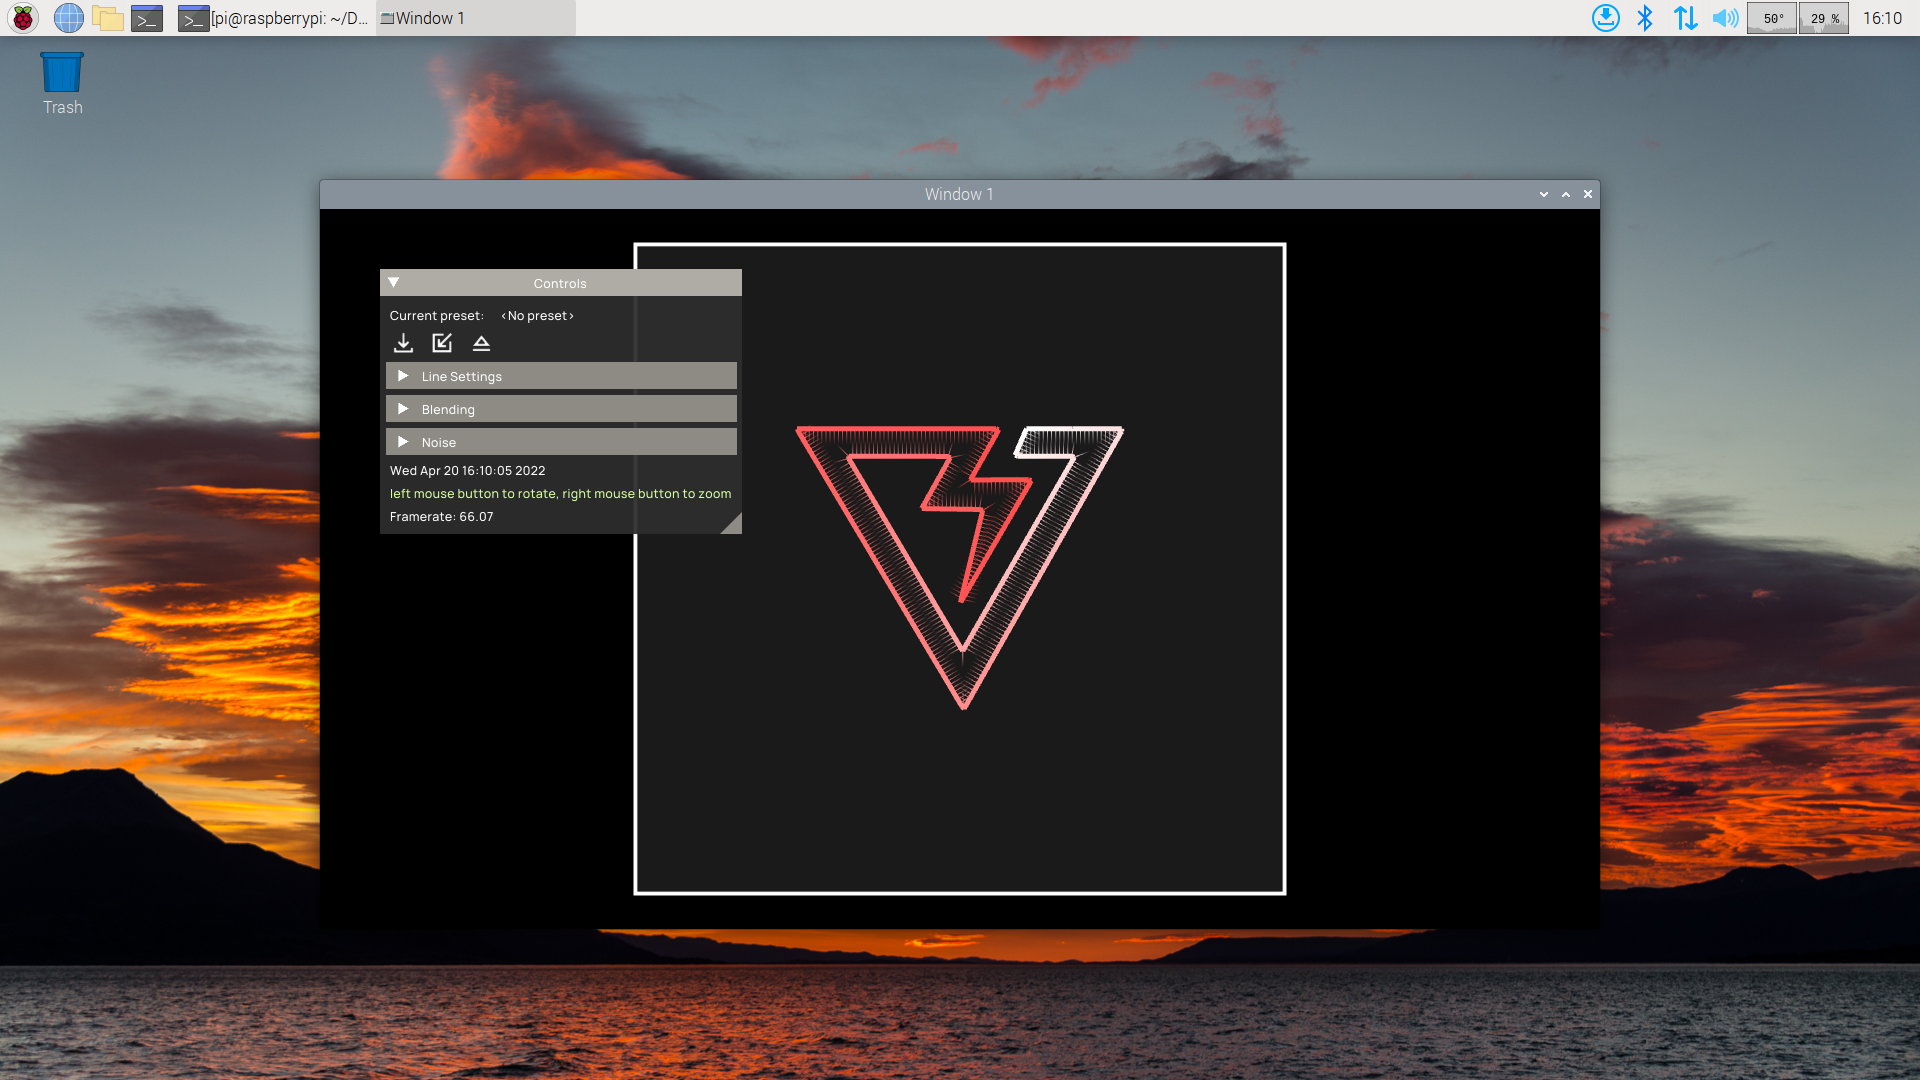
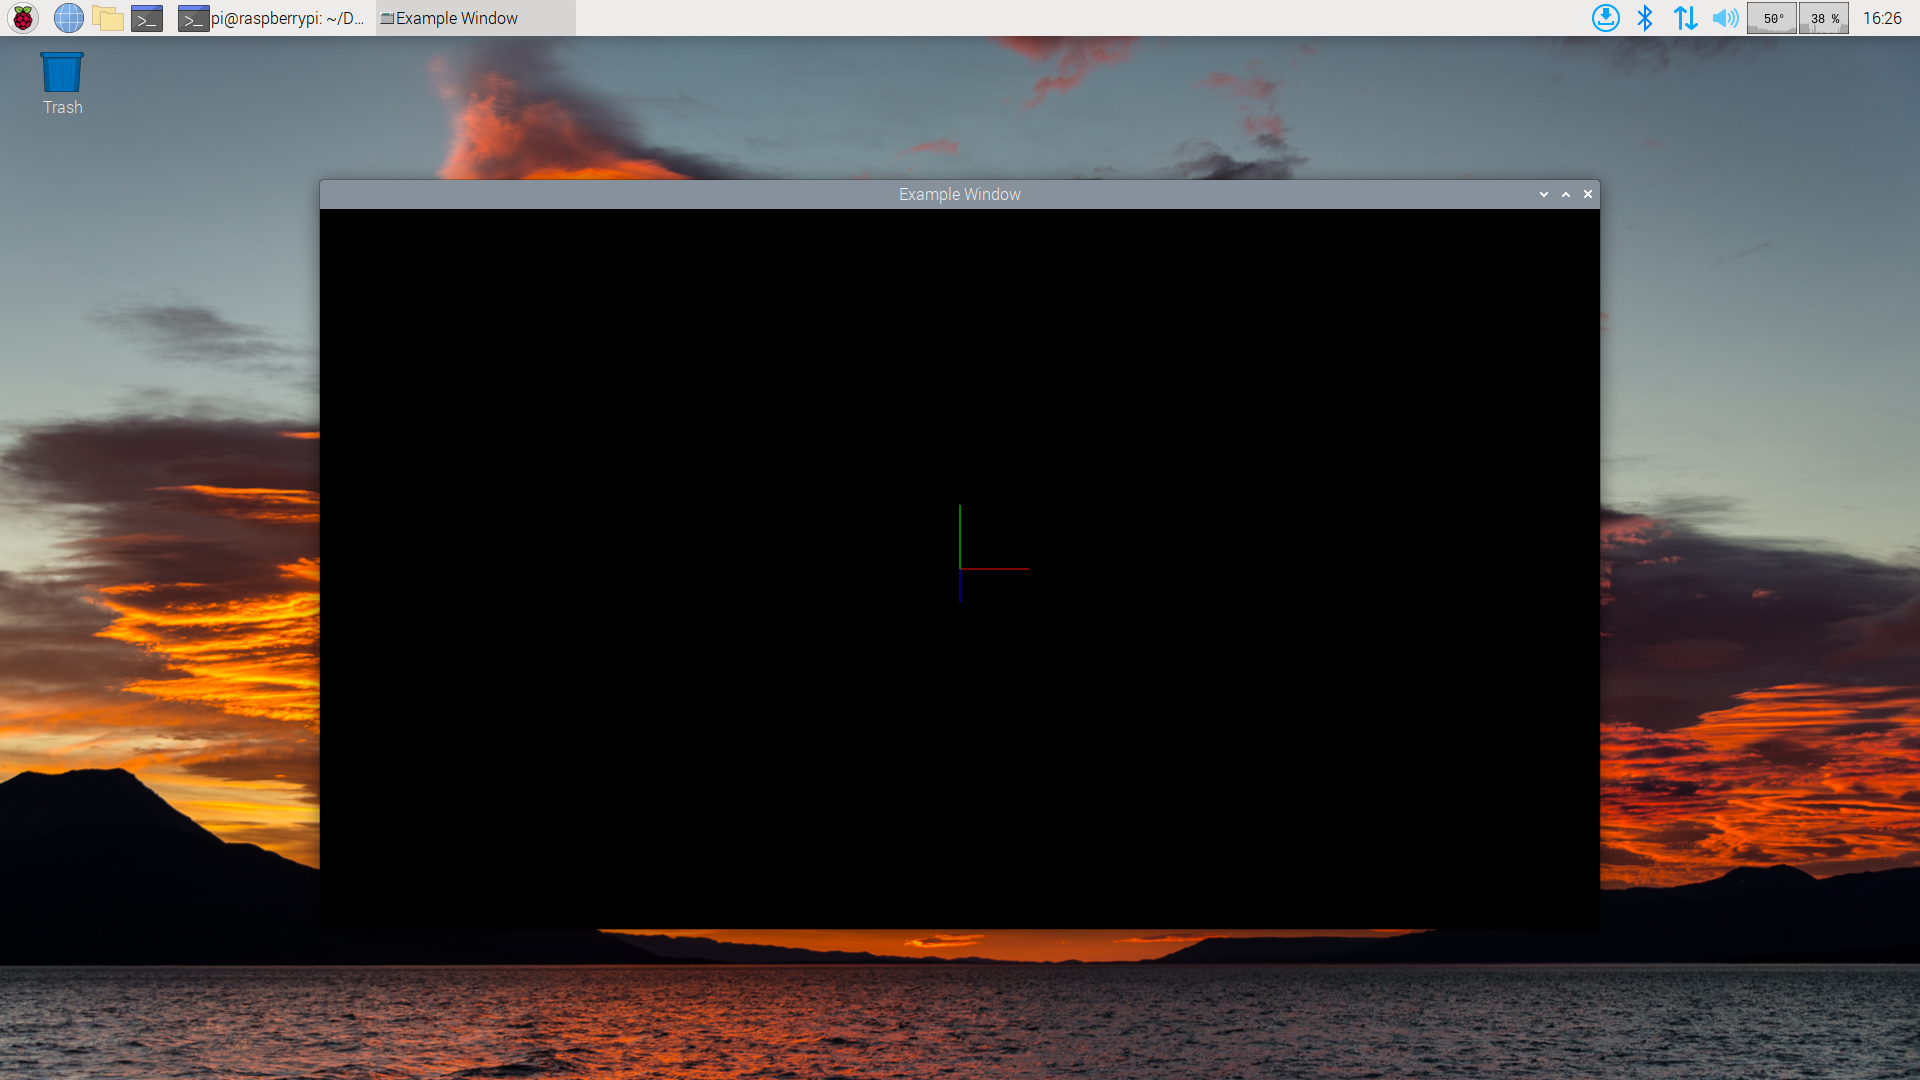
Now compile & run again. After a successful build the lineblending should appear on the display connected to your Pi!
When you have been successful compiling and running a demo app you can easily create a new project linked against the packaged NAP framework. Open a SSH terminal connection with your pi and cd to the tools folder inside the nap folder. From there you can create a new project using the create_project script. In the following example we will create a new NAP project called example

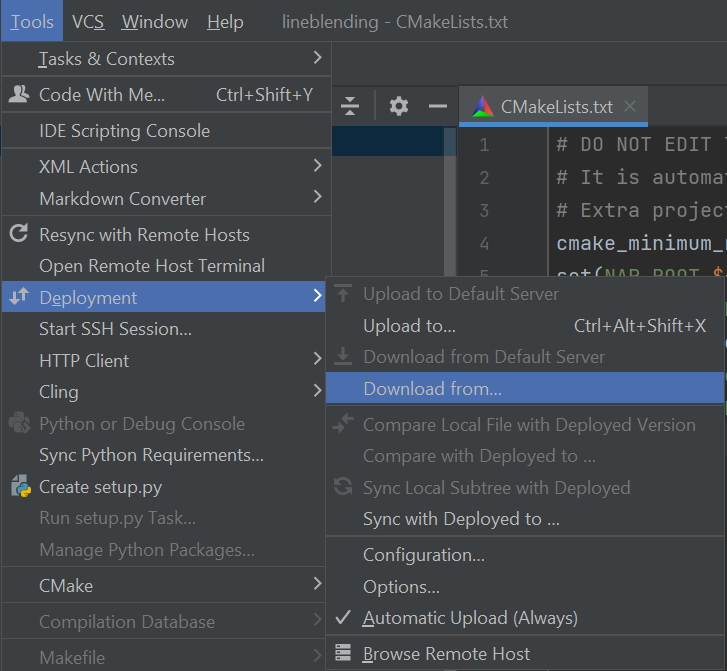
This will create the necessary folder, source and CMake files to compile and run your project and give you a good starting point to start working on your project. First you need to sync the generated project files back to your development PC by clicking on Tools > Deployment > Download from...
When download is complete there should be a folder inside projects called example. Load the CMakeLists.txt to create the project and compile & run it. Don't forget to set the display environment variable like we did when compiling the lineblending demo.
That's it! You should now be able to create your own projects compile them and start working on your own Pi projects using the NAP framework. On the Pi you will see an empty window containing nothing but a gnomon around which you can orbit with the camera using your mouse.
In order to setup the build environment and enable Clion to remotely build the Napkin editor we download and extract the pre-compiled Qt libraries. Luckily, you don't have to compile the Qt libraries on your Pi yourself since we have already done that for you. Download the compiled libraries for Raspbian here.
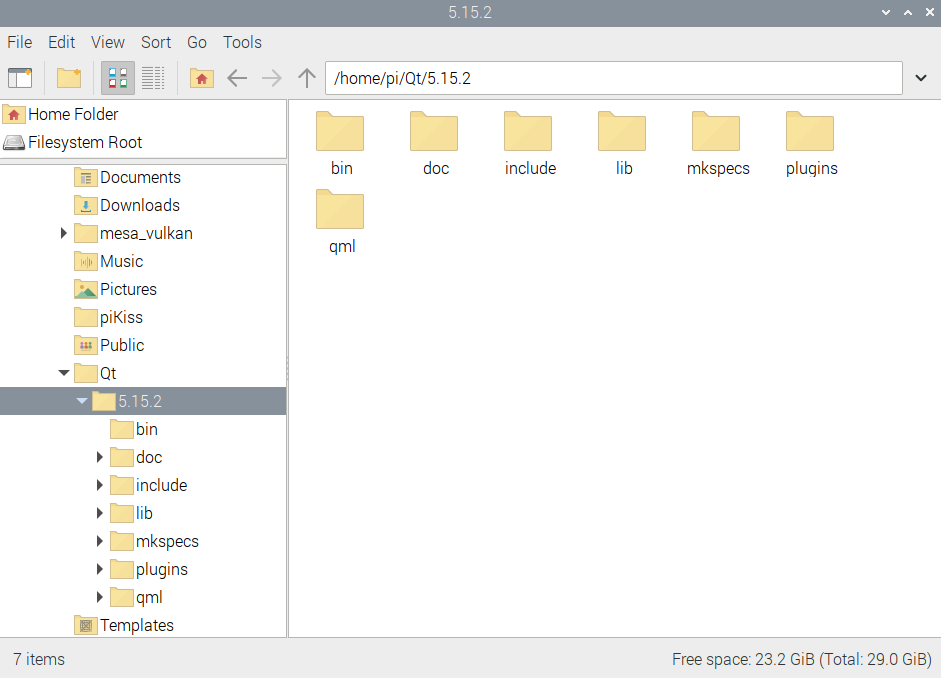
Once downloaded create a folder in you home directory called 'Qt' and extract the contents of download tar file into it. When done you should have a Qt folder with contents that look similar to this.
In order for Clion to compile a NAP app and find the needed thirdparty dependencies we can already setup a nap development directory and clone the thirdparty repository in there. (We can also add a new mapping in Clion Deployment and let Clion copy the thirdparty directory from your development PC to the Pi via ssh however this will take a long time and since the thirdparty directory will not change much it is easier to already clone the thirdparty repository yourself)
Open a new terminal and type the following lines
Once done you should have folder called 'nap_development' in your home directory that contains a folder called 'thirdparty'. The contents of the thirdparty directory should like this.

Now everything on your Pi is set up and you can start set up 'full remote mode' with Clion on your development machine.
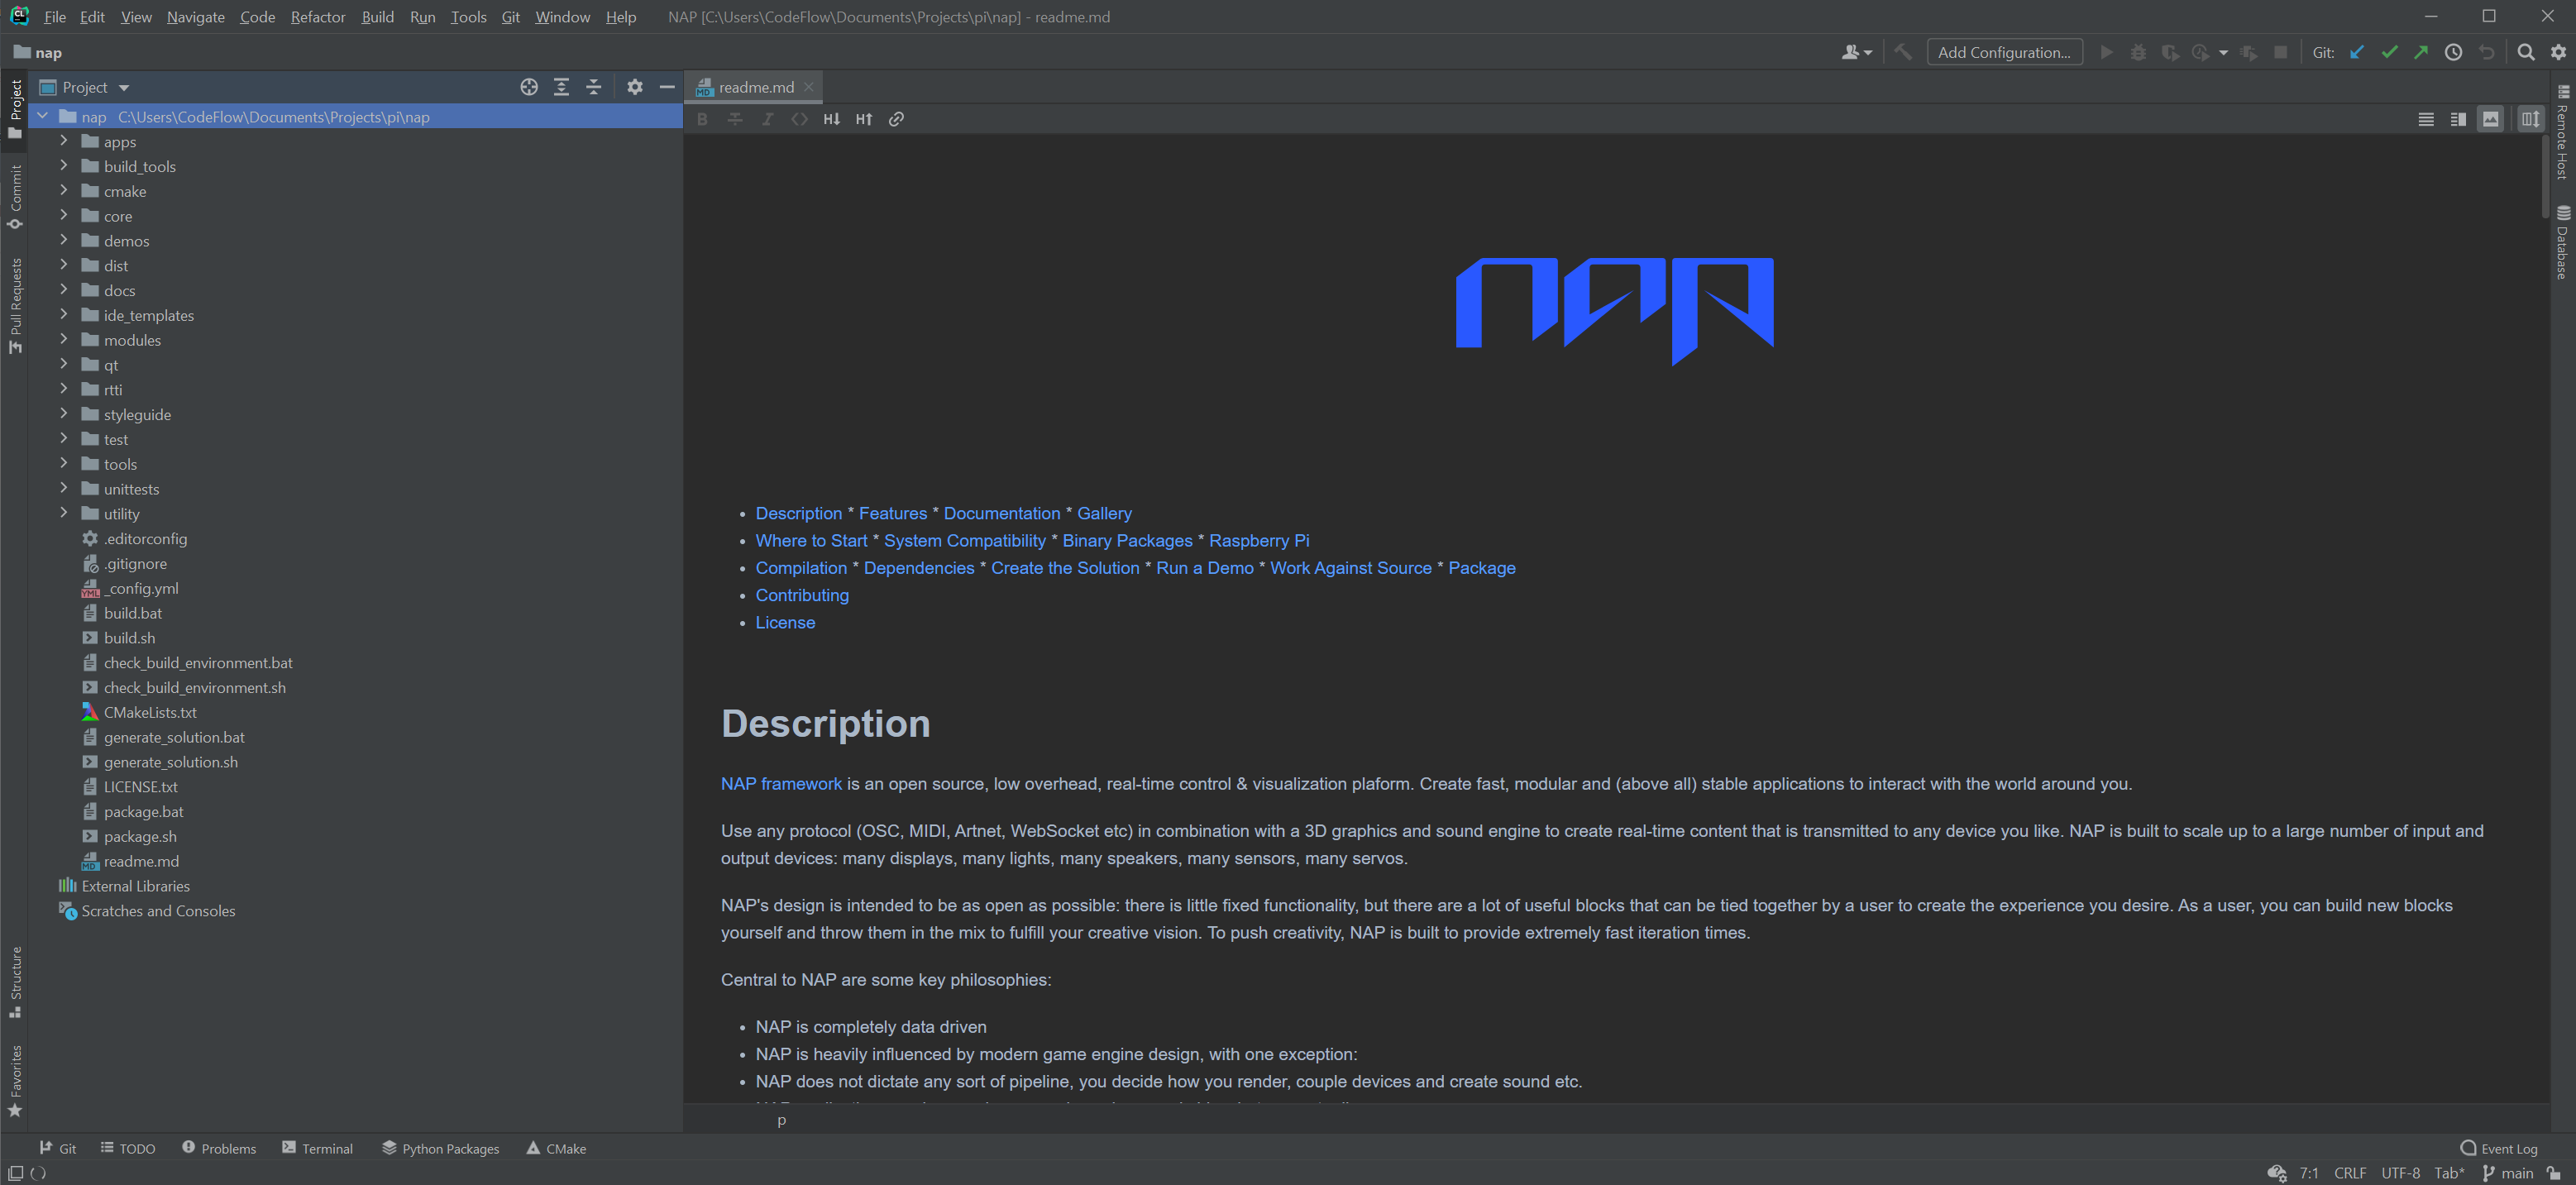
First we need to clone the NAP repository on your development machine from which you will use Clion. Clone the repository from github into a folder on your HD somewhere called nap. Once cloning is finished, open this folder with Clion. Once you opened the folder with Clion you should see something like this.
Now we can setup the raspberry pi as a remote deployment target. Navigate to deployment configuration by clicking on Tools > Deployment > Configuration
In the Deployment window add a new SFTP target called Pi. Once added we also need to add a new SSH configuration for this new SFTP target. Click on the newly created SFTP target and then proceed to create a new SSH configuration by clicking on 'create configuration'.
In the SSH Configurations window add a new configuration and enter the correct IP and credentials. Once done, click on 'Test Connection' to make sure Clion can connect with your Pi using SSH.
Clion now needs to sync the cloned nap directory alongside the thirdparty directory in the 'nap_development'. In order to do this we need to setup mapping correctly. In the the Deployment window select the created deployment target and navigate to mappings. Change the deployment path of the cloned nap directory on your development PC to a new nap directory alongside the 'thirdparty' directory in the 'nap_development' directory of your pi. See screenshot
Clion will use the CMake version installed on the raspberry pi by default. If there is an older version of CMake installed on the raspberry pi this can cause issues. The thirdparty directory contains the correct version of CMake. You can tell Clion to use this version of CMake.
Go to Settings > Build, Execution, Deployment > ToolsChains. Select Custom and instead of bundled choose Custom Cmake Executable. Browse to the correct CMake executable installed in the thirdparty directory.
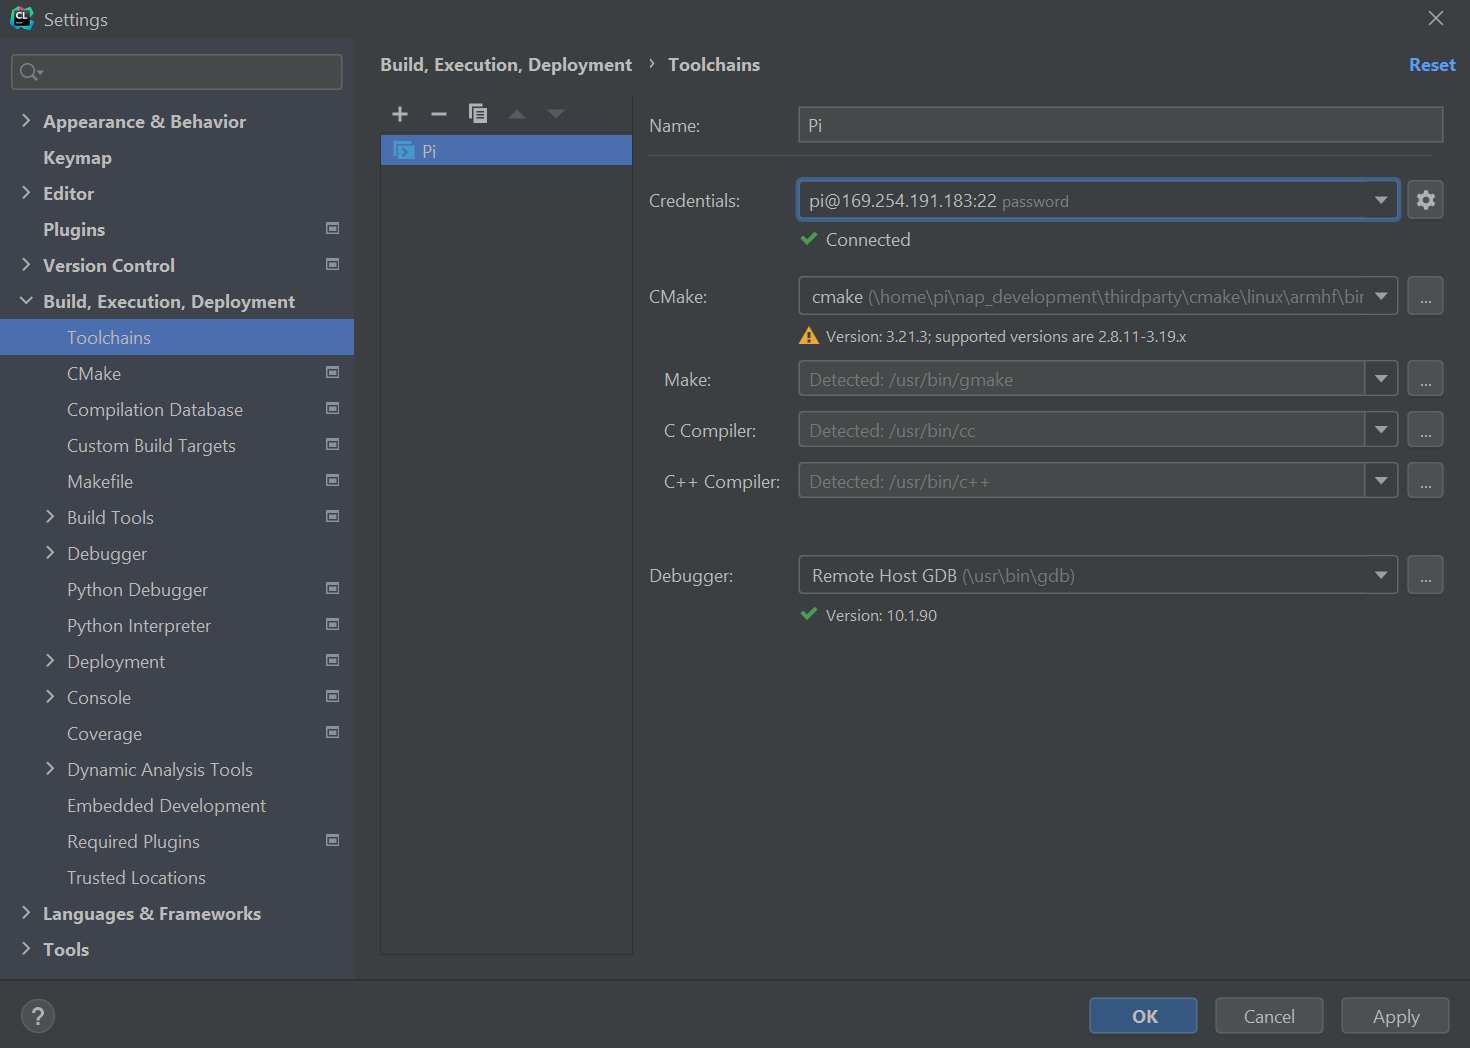
Now it is time to setup a new toolchain for remote deployment. Navigate to Settings > Build, Execution, Deployment > Toolchains and add a new toolchain by clicking on the + button. Select Remote Host
Select the previously created SSH configuration as Credentials. Then select cmake included in the thirdparty repository of nap on the Pi. Make sure to select the armhf version of cmake. See screenshot. Clion will throw a warning complaining about a non-supported version of cmake being used. It is safe to ignore this warning.
Click on apply and navigate to CMake in the left pane of the Settings menu.
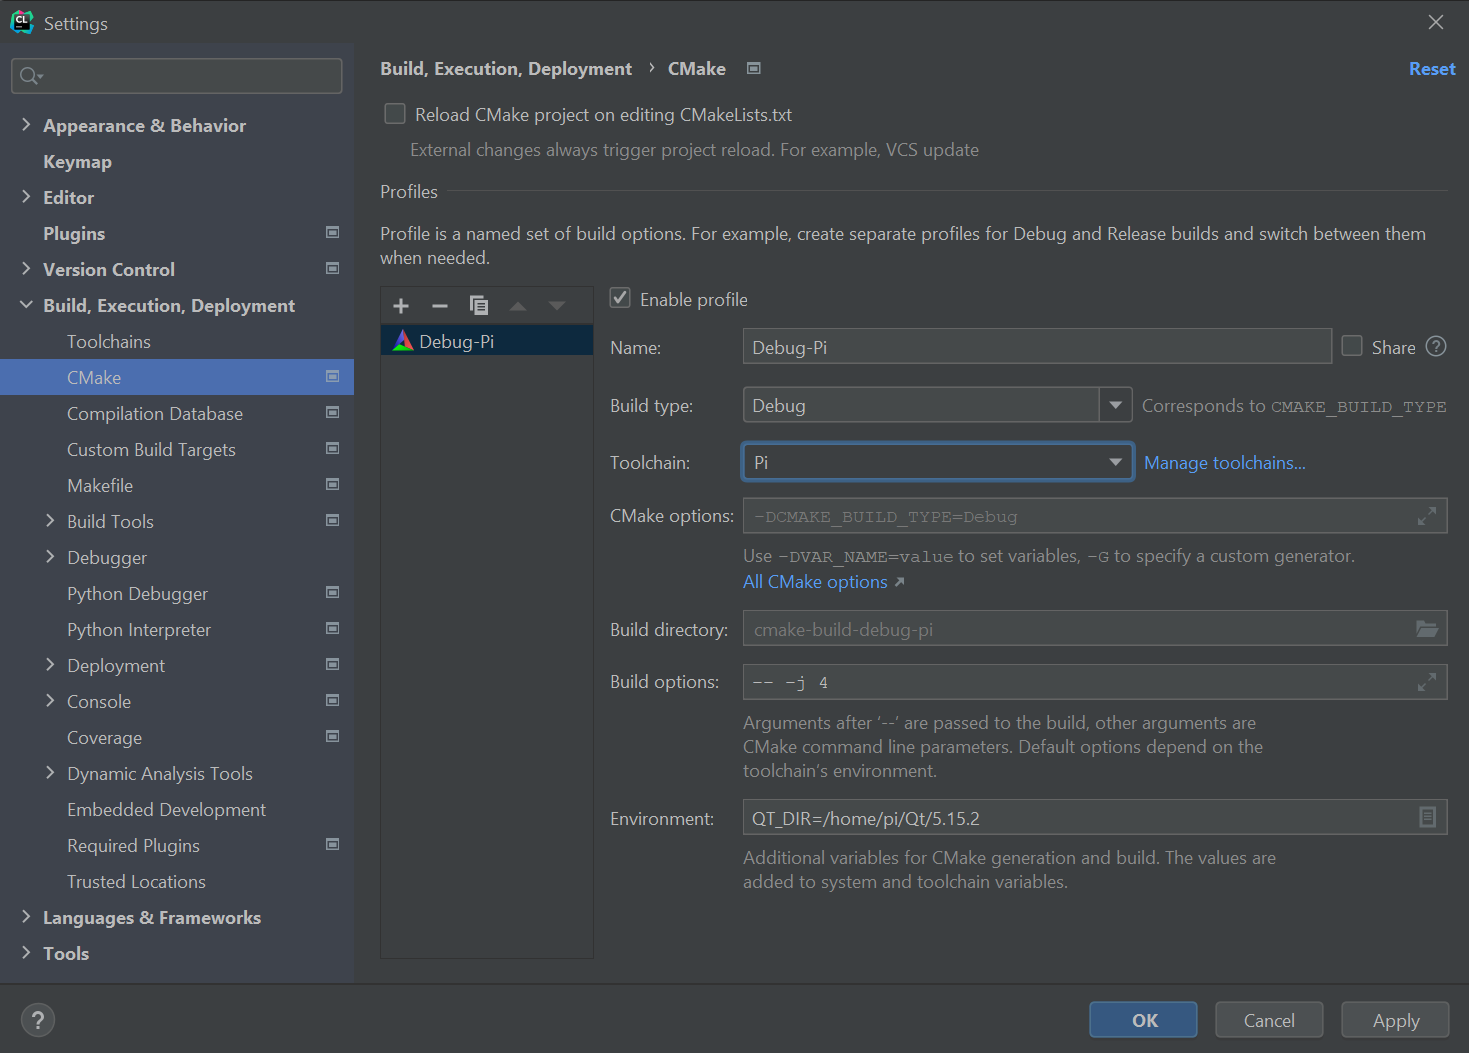
Navigate to Settings > Build, Execution, Deployment > CMake. Create a new CMake profile by clicking on the + button. We can set CMake to use all 4 cores of the Pi when compiling by adding "-- -j 4" to the build options. You also need to set the correct QT_DIR path variable. Set the QT_DIR variable to the path where we extracted the previously downloaded Qt libraries
Click on apply.
Now Clion should start syncing your local nap directory with the nap directory on the Pi, after some time it will complete uploading all the necessary files.

When finished CMake will run configure & generate the project.

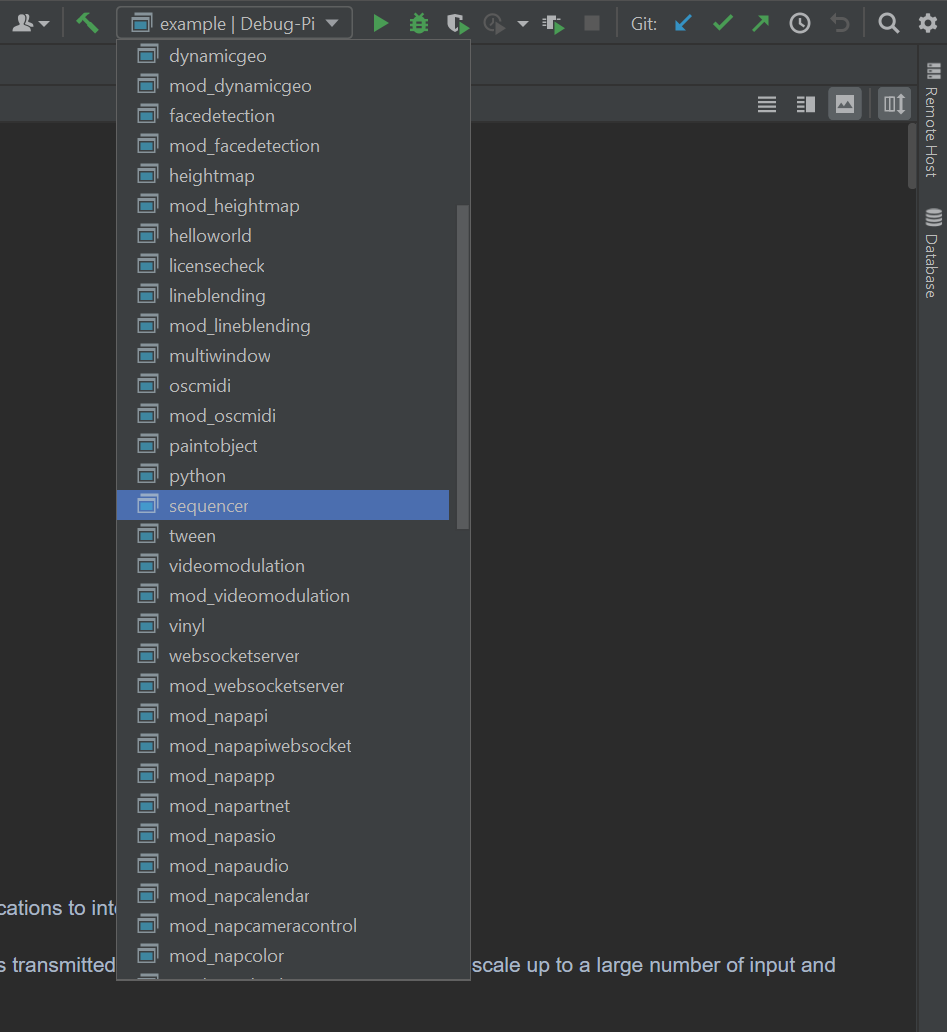
Now it is possible to compile, debug & run NAP apps on the Pi from your development PC. Select one of the demo apps on the right side and click on run or debug
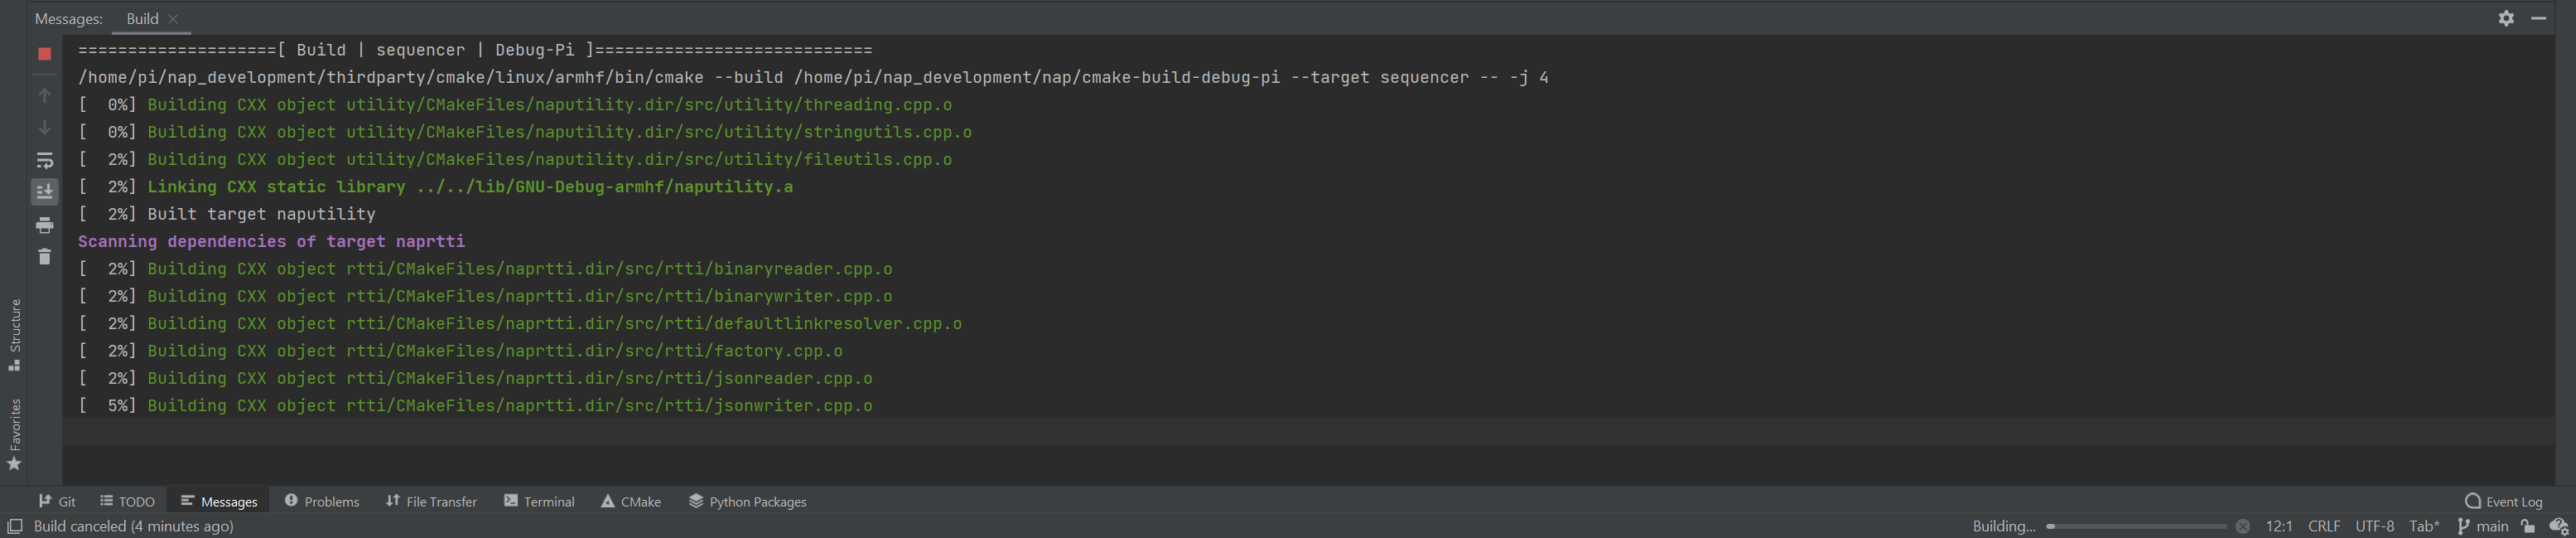
Clion will now start compiling the selected build target on the Pi. This can take a while, especially the first time.
Because the build application is launched via SSH it cannot find the default display and RenderService will fail on initialization. We have to set an environment variable in order for the RenderService to initialize and display a window on screen.
Go to Edit Configurations on the upper right side of the Clion window.
In the Run/Debug configurations window you can set the environment variables for the target that you want to build. If you want to set it to the first display set it to
If you have multiple displays connected, you can change 0 to another index of a connected display.
That's it! You should now be able to compile, develop and debug a NAP app from source on the Raspberry Pi and use the Clion IDE on your development PC!
